
Chow Mein Sauce Recipe: The Secret to Flavorful, Takeout-Sty...
1 views · Nov 13, 2024 horoscopochino.co
Chow Mein Sauce Recipe: The Secret to Flavorful, Takeout-Style Noodles Ever wondered why restaurant chow mein tastes so much better? The secret is in the sauce! Chow mein sauce brings a perfect balance of savory, slightly sweet, and umami flavors that make noodles addictive. Whether you're stir-frying veggies, chicken, or beef, this homemade sauce will take your chow mein to a whole new level. This chow mein sauce recipe serves 4 people, making it perfect for a family dinner or meal prep. Here’s what you’ll need: 1/4 cup soy sauce 2 tbsp oyster sauce 1 tbsp hoisin sauce 1 tbsp sesame oil 1 tbsp brown sugar 2 tbsp water 1 tsp cornstarch (for thickness) 1/4 tsp white pepper (optional, for a bit of heat) Start by combining all the ingredients in a small bowl or measuring cup. Whisk until the brown sugar is dissolved, and the cornstarch is fully mixed in. The cornstarch helps to thicken the sauce so that it clings beautifully to each noodle and vegetable, giving your chow mein that perfect glossy finish. Soy sauce is the base of this sauce, providing a salty, rich umami flavor. Oyster sauce adds a deeper, slightly sweet flavor, while hoisin sauce brings a bit of tang and complexity. Sesame oil adds a hint of nuttiness, making the sauce taste truly authentic. Finally, a little brown sugar rounds out the flavors and balances the savory ingredients perfectly. Now, how do you use this sauce to make the best chow mein? Start by cooking your noodles according to package instructions, then drain and set aside. In a large skillet or wok, heat some oil over medium-high heat, and add your choice of proteins (chicken, shrimp, tofu, or beef). Sear until golden, then add sliced vegetables like bell peppers, carrots, cabbage, and bean sprouts. Once the veggies are slightly softened, add the cooked noodles and pour the chow mein sauce over everything. Toss everything together quickly over high heat so the sauce coats all the ingredients evenly. This quick stir-fry ensures the noodles soak up all the flavors without becoming too soft. Serve your chow mein hot, garnished with green onions or sesame seeds for extra flair. The sauce is so versatile that you can easily adjust it—add more sesame oil for nuttiness, or hoisin for sweetness. What’s your favorite protein or veggie combo with chow mein sauce? Share in the comments and inspire others to create their perfect chow mein at home! See more: All About Hoisin Sauce: The Sweet and Savory Flavor Booster You Need https://youtu.be/ZxRvBrbjIqA #ChowMeinSauce #HomemadeNoodles #TakeoutAtHome

Creamy Bacon Carbonara: A Comforting Twist on a Classic Reci...
18 views · Nov 13, 2024 horoscopochino.co
Creamy Bacon Carbonara: A Comforting Twist on a Classic Recipe Imagine a plate of pasta coated in a creamy, savory sauce with crispy bacon, a hint of Parmesan, and a generous sprinkle of black pepper. That’s bacon carbonara—a delicious twist on the Italian classic that’s easy to make and packed with flavor! Perfect for a quick dinner or a cozy weekend meal, this recipe will have you feeling like a chef in your own kitchen. This bacon carbonara recipe serves two people, making it ideal for a date night or a cozy meal for one with leftovers. Here’s what you’ll need: 200g (about 7 oz) spaghetti or pasta of your choice 100g (3.5 oz) bacon, diced 2 large eggs 1/2 cup grated Parmesan cheese Freshly ground black pepper, to taste Salt for pasta water Fresh parsley for garnish (optional) Start by bringing a large pot of salted water to a boil and cook the pasta until it’s al dente. While the pasta cooks, you’ll get the bacon and sauce ready. In a large skillet, cook the diced bacon over medium heat until it’s crispy, about 5-7 minutes. The bacon fat that renders in the pan will infuse the pasta with a smoky, savory flavor, making each bite irresistible. Once the bacon is crispy, remove the skillet from the heat, but leave the bacon and fat in the pan to keep everything warm. In a small bowl, whisk together the eggs and Parmesan cheese. This mixture will be the base for your carbonara sauce, creating that creamy texture without the need for heavy cream. Add a generous amount of freshly ground black pepper to the mixture for an extra burst of flavor. When the pasta is done, reserve about a cup of pasta water before draining. Add the pasta to the skillet with the bacon, tossing it gently to coat the noodles in the bacon fat. With the skillet off the heat, quickly pour in the egg and cheese mixture, tossing constantly to coat the pasta without scrambling the eggs. Add a splash of reserved pasta water as needed to achieve a smooth, creamy consistency. Serve your bacon carbonara hot, garnished with extra Parmesan, black pepper, and fresh parsley if you like. Each bite is a perfect mix of creamy, savory, and just a little bit smoky—comfort food at its finest. Do you add any special ingredients or twists to your carbonara? Let’s share tips in the comments to keep our bacon carbonara game strong! #BaconCarbonara #CreamyComfort #ItalianInspired

Homemade Red Sauce Pasta Recipe: Easy, Flavorful, and Irresi...
2 views · Nov 13, 2024 horoscopochino.co
Homemade Red Sauce Pasta Recipe: Easy, Flavorful, and Irresistible Ever crave a comforting, homemade pasta dish with rich, tangy red sauce? This homemade red sauce pasta is exactly what you need! With fresh ingredients and simple steps, you’ll make a mouth-watering meal that’ll rival any Italian restaurant. This dish is perfect for a cozy night in or when you want to impress friends with a delicious and easy meal that’s full of flavor. This recipe makes enough for 4 servings—ideal for a family dinner or meal prep for the week. Here’s everything you’ll need: 400g of your favorite pasta (spaghetti, penne, or fusilli work great) 1 can (400g) of crushed tomatoes (preferably San Marzano for rich flavor) 1 small onion, finely chopped 2 cloves of garlic, minced 2 tbsp olive oil 1 tsp sugar Salt and black pepper to taste 1 tsp dried basil or 5-6 fresh basil leaves 1 tsp dried oregano ¼ tsp red pepper flakes (optional, for a bit of heat) Freshly grated Parmesan for serving Fresh parsley or basil for garnish First, cook the pasta in a large pot of salted boiling water until it’s al dente (usually about 8-10 minutes). Drain it and set it aside, saving a small cup of the pasta water in case you need it to adjust the sauce consistency later. Now, for the magic—the red sauce. Heat the olive oil in a large skillet over medium heat. Add the chopped onion and cook until it softens and turns translucent, about 3-4 minutes. Next, add the minced garlic and cook for just a minute until fragrant (be careful not to let it brown, as garlic can get bitter if overcooked). Pour in the crushed tomatoes, stirring well. Add salt, black pepper, sugar (to balance the acidity of the tomatoes), and your herbs—dried basil, oregano, and the red pepper flakes if you’re in the mood for a bit of spice. Let the sauce simmer gently for about 15-20 minutes, stirring occasionally. As it cooks, the sauce will thicken and develop a deep, savory flavor. When the sauce is ready, add the pasta to the skillet and toss everything together until each strand or piece is coated in that delicious red sauce. If the sauce seems too thick, add a splash of the reserved pasta water to reach your desired consistency. Serve your red sauce pasta topped with freshly grated Parmesan and a sprinkle of chopped parsley or fresh basil. What’s your favorite way to add a personal touch to red sauce pasta? Share your ideas in the comments and inspire others to make this classic dish even better! #RedSaucePasta #EasyItalianCooking #comfortfood See also: Red sauce pasta recipe https://horoscopochino.co/red-sauce-pasta-recipes/

Hoisin Chicken Stir Fry Recipe Quick, Flavorful, and Perfect...
2 views · Nov 13, 2024 horoscopochino.co
Hoisin Chicken Stir Fry Recipe: Quick, Flavorful, and Perfect for Dinner Craving a stir-fry that’s bursting with flavor and comes together in minutes? This Hoisin Chicken Stir Fry is the answer! With tender chicken, fresh veggies, and a sweet-savory hoisin sauce, it’s the perfect balance of deliciousness and convenience. Plus, it’s easy enough for a weeknight dinner but impressive enough to serve to guests. This recipe serves 4 people, so it’s great for a family meal or leftovers for the next day. Here’s what you’ll need: 500g (1 lb) boneless, skinless chicken breast, cut into thin strips 1 red bell pepper, sliced 1 zucchini, sliced 1 cup broccoli florets 2 tbsp vegetable oil (for cooking) 3 green onions, chopped (for garnish) Sesame seeds (optional for garnish) For the sauce: 1/4 cup hoisin sauce 2 tbsp soy sauce 1 tbsp rice vinegar 1 tbsp honey or brown sugar 1 tsp sesame oil 2 garlic cloves, minced 1 tsp ginger, grated To begin, whisk together the sauce ingredients in a small bowl: hoisin sauce, soy sauce, rice vinegar, honey, sesame oil, garlic, and ginger. This sauce is the heart of the dish, delivering that mouthwatering blend of sweet and savory that makes every bite irresistible. Next, heat a large skillet or wok over medium-high heat. Add 1 tablespoon of vegetable oil, and once it’s hot, add the chicken strips. Stir-fry the chicken for 5-6 minutes until it’s cooked through and golden brown on the edges. Remove the chicken from the pan and set it aside. In the same pan, add the remaining tablespoon of oil. Toss in the red bell pepper, zucchini, and broccoli florets. Stir-fry the veggies for about 3-4 minutes, just until they’re tender-crisp. You want them to retain a little crunch for texture and to hold up well in the sauce. Return the cooked chicken to the pan, pour in the sauce, and toss everything together until the chicken and veggies are evenly coated. Let the stir-fry cook for an additional 2-3 minutes, allowing the sauce to slightly thicken and coat everything beautifully. Serve your Hoisin Chicken Stir Fry hot, garnished with green onions and a sprinkle of sesame seeds for a bit of crunch. Pair it with steamed rice or noodles, and you have a meal that’s satisfying, flavorful, and healthy. What other veggies would you add to make this dish your own? Share your ideas in the comments, and let’s inspire each other to make every stir-fry unforgettable! #HoisinChickenStirFry #QuickAndTasty #weeknightdinners

Irresistible Chicken Nibbles Recipe: Perfect for Parties and...
0 views · Nov 13, 2024 horoscopochino.co
Irresistible Chicken Nibbles Recipe: Perfect for Parties and Snacking Looking for the perfect snack or party food? Chicken nibbles are the ultimate crowd-pleaser! These bite-sized pieces are packed with flavor, easy to make, and guaranteed to disappear fast at any gathering. Whether you like them sweet, spicy, or a bit tangy, this recipe will show you how to make chicken nibbles that everyone will rave about. This recipe serves about 4-6 people, making it ideal for a small get-together or a family snack session. Here’s what you’ll need: 1 kg (about 2 lbs) chicken nibbles (drumettes and wingettes) 2 tbsp olive oil 1/2 cup soy sauce 1/4 cup honey 2 tbsp ketchup 1 tbsp sriracha or hot sauce (optional for spice) 2 garlic cloves, minced 1 tsp ginger, grated 1/4 tsp black pepper Sesame seeds and chopped green onions for garnish (optional) To start, preheat your oven to 400°F (200°C). This high heat will help give the chicken nibbles a nice crispy finish. Line a baking sheet with aluminum foil or parchment paper for easy cleanup, then place a wire rack on top of the baking sheet. The wire rack allows the chicken to cook evenly and get a delicious, crisp exterior. In a large bowl, combine olive oil, soy sauce, honey, ketchup, sriracha (if you like a bit of heat), garlic, ginger, and black pepper. Whisk everything together until you have a smooth marinade. This mixture has the perfect balance of sweet, savory, and slightly spicy flavors, giving the chicken that addictive taste everyone loves. Add the chicken nibbles to the bowl and toss them in the marinade until each piece is fully coated. Let them sit for about 10-15 minutes to absorb the flavors. If you have extra time, marinating for a few hours in the fridge will make them even tastier! Arrange the marinated chicken nibbles on the wire rack in a single layer, ensuring they don’t touch so they cook evenly. Bake in the preheated oven for 25-30 minutes, flipping halfway through, until the chicken is cooked through and the skin is golden brown. Once out of the oven, sprinkle the chicken nibbles with sesame seeds and chopped green onions for a pop of color and extra flavor. Serve them hot, and watch them disappear quickly! Have a favorite dipping sauce or seasoning for your chicken nibbles? Share it in the comments, and let’s inspire others to try something new! #chickennibbles #partysnacksrecipe #partysnacks #bitesizedchicken

Classic Beef Ragu Recipe: Rich, Savory, and Perfect for Past...
53 views · Nov 13, 2024 horoscopochino.co
Classic Beef Ragu Recipe: Rich, Savory, and Perfect for Pasta Night If you’re craving a dish that’s hearty, savory, and packed with rich flavors, beef ragu is where it’s at. Imagine tender beef simmered in a tomato sauce that’s bursting with garlic, herbs, and a hint of red wine, coating every strand of pasta in deep, complex flavors. This recipe serves 4, ideal for a family dinner or to enjoy leftovers the next day. Here’s what you’ll need: 1 lb (450g) beef chuck or stew meat, cut into cubes 2 tbsp olive oil 1 onion, diced 2 carrots, diced 2 celery stalks, diced 4 cloves garlic, minced 1 cup red wine (optional, but highly recommended) 1 can (28 oz) crushed tomatoes 1 cup beef broth 1 tsp dried thyme 1 tsp dried rosemary Salt and pepper, to taste Fresh parsley and Parmesan for garnish Start by heating the olive oil in a large pot over medium-high heat. Season the beef with salt and pepper, then sear the cubes in the hot oil until browned on all sides. This caramelizes the meat and locks in flavor. Once browned, remove the beef from the pot and set it aside. In the same pot, add the onion, carrots, and celery, cooking until they’re softened and golden, about 5 minutes. Add the garlic and cook for another minute, letting the aroma fill your kitchen. These veggies are the base of your ragu and will add a touch of sweetness that balances the richness of the sauce. Pour in the red wine, scraping up any browned bits from the bottom of the pot, then let it reduce for a few minutes. This step gives the sauce a deep, complex flavor. If you’re not using wine, you can skip this step and move straight to the tomatoes and beef broth. Add the crushed tomatoes, beef broth, thyme, rosemary, and the browned beef back to the pot. Bring everything to a simmer, then reduce the heat to low, cover, and let it cook for 2-3 hours. The beef will become tender, and the flavors will meld beautifully. Stir occasionally and add a little more broth if the sauce gets too thick. Serve this delicious beef ragu over pasta, garnished with fresh parsley and a sprinkle of Parmesan. Every bite is comfort in a bowl, perfect for pasta lovers! How do you like to enjoy your beef ragu? Let’s share ideas and inspire each other to get creative with this classic dish! #BeefRagu #ItalianComfortFood #pastanight

Easy and Flavorful Bruschetta Recipe: A Perfect Appetizer An...
0 views · Nov 13, 2024 horoscopochino.co
Easy and Flavorful Bruschetta Recipe: A Perfect Appetizer Anytime Looking for an appetizer that’s fresh, delicious, and unbelievably easy? Bruschetta is the answer! With juicy tomatoes, fragrant basil, and crusty bread, this Italian classic is the perfect start to any meal or a quick snack that feels special. The best part? It only takes a few ingredients and minutes to prepare but tastes like you spent all day on it! This recipe makes enough for 4 people as an appetizer or snack. Here’s what you’ll need: 1 French baguette or Italian loaf, sliced into 1/2-inch thick pieces 4 ripe Roma tomatoes, diced 1/4 cup fresh basil, finely chopped 2 cloves garlic, minced 3 tbsp extra virgin olive oil (plus extra for brushing) Salt and freshly ground black pepper, to taste Balsamic glaze (optional, for drizzling) To start, preheat your oven to 400°F (200°C). Arrange the baguette slices on a baking sheet and brush each slice with a bit of olive oil. This step helps the bread get golden and crunchy, giving it a delicious base for the toppings. Toast in the oven for about 5-7 minutes until the edges are just golden and crispy. While the bread is toasting, make the tomato topping. In a medium bowl, combine the diced tomatoes, minced garlic, and fresh basil. Drizzle with the olive oil and season with salt and black pepper. Gently toss everything together until the tomatoes are coated in that lovely garlicky, basil-infused oil. The combination of fresh tomatoes, basil, and garlic brings a burst of flavor that’s hard to beat! Once the bread is ready, spoon a generous amount of the tomato mixture onto each toasted slice. If you love a bit of extra sweetness and tang, add a light drizzle of balsamic glaze on top for that finishing touch. Serve your bruschetta immediately while the bread is still warm and crisp, topped with those juicy tomatoes and fresh basil. This dish is a crowd-pleaser, whether you’re hosting a gathering or just enjoying a snack. The flavors are bright, fresh, and perfect for any occasion. Do you have a unique twist or extra ingredient that you love adding to your bruschetta? Share it below and inspire others to get creative with this delicious Italian appetizer! #2024 #bruschetta #EasyBruschetta #ItalianAppetizer #tomatobasil

Pancetta Pasta: A Simple, Savory Italian Recipe to Savor
73 views · Nov 13, 2024 horoscopochino.co
Pancetta Pasta: A Simple, Savory Italian Recipe to Savor Looking for a pasta dish that’s rich, savory, and ridiculously easy to make? Pancetta pasta is your answer. With crispy, smoky pancetta, garlic, and a hint of Parmesan, this dish turns simple ingredients into a seriously satisfying meal. It’s perfect for a cozy night in or an impressive dinner for friends, and it comes together in under 30 minutes! This recipe serves two, making it perfect for date night or a solo treat with leftovers. Here’s what you’ll need: 200g (about 7 oz) pasta (spaghetti or rigatoni work well) 100g (3.5 oz) pancetta, diced 1 tbsp olive oil 2 cloves garlic, minced 1/4 cup grated Parmesan cheese Salt and freshly ground black pepper to taste Fresh parsley or basil for garnish (optional) Start by bringing a large pot of salted water to a boil and cook the pasta according to package instructions until it’s al dente. Meanwhile, you can get started on the delicious pancetta base. In a large skillet over medium heat, add the olive oil and diced pancetta. Let it cook for about 5-7 minutes, stirring occasionally, until the pancetta becomes golden brown and crispy, releasing its flavorful fat. This rendered fat is where all the magic happens, adding depth to the pasta. Next, add the minced garlic to the skillet and cook for another 1-2 minutes until fragrant. Be careful not to burn the garlic, as it can turn bitter. The garlic should blend with the pancetta and create a savory, aromatic base that’s truly irresistible. Once the pasta is ready, reserve about a cup of pasta water before draining. Add the pasta directly to the skillet with the pancetta and garlic, tossing to coat the noodles in the savory mixture. If the pasta seems dry, add a splash of the reserved pasta water to create a smooth, silky sauce. Finally, sprinkle in the grated Parmesan and a dash of black pepper, tossing again to combine everything. The Parmesan will melt into the sauce, giving it a creamy texture without the need for cream. Serve your pancetta pasta hot, garnished with fresh parsley or basil for a pop of color and flavor. This pasta is proof that simple ingredients can create unforgettable flavors. So, what’s your favorite twist on pancetta pasta? Let’s share ideas in the comments and keep the inspiration going! #PancettaPasta #SavoryItalian #quickpastarecipe

Crispy and Savory Pancetta Recipe: The Perfect Italian Touch...
0 views · Nov 13, 2024 horoscopochino.co
Crispy and Savory Pancetta Recipe: The Perfect Italian Touch for Any Dish If you love the rich, smoky flavor of bacon but want something a bit more sophisticated, pancetta is the way to go. This Italian cured pork adds a beautifully savory, slightly salty punch to any dish. Whether you’re adding it to pasta, tossing it into salads, or just enjoying it as a crispy topping, this pancetta recipe is a must-try. This recipe serves 4 people as an addition to pasta, salads, or as a topping. Here’s what you’ll need: 200g (about 7 oz) pancetta, diced or thinly sliced 1 tbsp olive oil (optional, if you want extra crispiness) Freshly ground black pepper (optional, to taste) Start by heating a large skillet over medium heat. If your pancetta is a bit lean, add a drizzle of olive oil to help it crisp up. Once the skillet is hot, add the pancetta in an even layer, letting it cook without stirring for a couple of minutes to render the fat. The pancetta will start to crisp up beautifully, releasing its flavors and filling your kitchen with that irresistible aroma. After the first few minutes, stir the pancetta occasionally to make sure it cooks evenly on all sides. In about 5-7 minutes, you’ll have crispy pancetta pieces, with the fat rendered down to a golden liquid that can be saved for cooking other ingredients—it’s like liquid gold for flavor! For a finishing touch, sprinkle a bit of black pepper over the pancetta while it’s still warm. This will give it a subtle, peppery kick that’s perfect in pasta dishes like carbonara or tossed into a salad for added crunch. Once your pancetta is perfectly crispy, use a slotted spoon to transfer it to a plate lined with paper towels. This will absorb any extra grease and keep the pancetta crisp. From here, you can use it as a topping for pasta, a savory boost in scrambled eggs, or even as a crunchy addition to creamy soups. What makes pancetta so versatile is its rich, umami-packed flavor that elevates any dish without overwhelming it. The texture is also more delicate than bacon, allowing it to complement other ingredients while adding depth. Do you have a favorite dish where you love to add crispy pancetta? Let’s hear your ideas in the comments, and inspire each other to get creative with this Italian classic! #PancettaPerfection #ItalianCooking #CrispyPancetta

Easy and Delicious Pasta Tomato Recipe for a Perfect Italian...
1 views · Nov 3, 2024 horoscopochino.co
Easy and Delicious Pasta Tomato Recipe for a Perfect Italian Meal This pasta tomato recipe is exactly what you need to satisfy that craving! It’s quick, flavorful, and so satisfying that it’ll become a staple in your kitchen. Plus, with fresh tomatoes and fragrant basil, it’s like a mini Italian escape right at home. This recipe serves four people and only requires a few key ingredients: 400g of pasta (spaghetti, penne, or your favorite) 500g ripe tomatoes (or 1 can of crushed tomatoes if you’re in a rush) 1 small onion, finely chopped 3 cloves of garlic, minced 3 tbsp olive oil Salt and black pepper to taste 1 tsp sugar (to balance the acidity) 1 tsp dried oregano A handful of fresh basil leaves (or 1 tsp dried basil) Freshly grated Parmesan cheese for serving Start by cooking the pasta in a large pot of salted boiling water until al dente, which usually takes about 8-10 minutes. Once the pasta is cooked, drain it and set it aside, saving a small cup of the pasta water to use later in the sauce if needed. While the pasta cooks, it’s time to make that rich tomato sauce. Begin by heating the olive oil in a large skillet over medium heat. Add the chopped onion and cook until it turns soft and translucent, about 4 minutes. This gives the sauce a sweet and rich base. Next, add the minced garlic and cook for just a minute, being careful not to brown it (garlic burns quickly and can turn bitter). Now, add the chopped fresh tomatoes (or canned if you’re short on time). Stir well, and add salt, black pepper, sugar, oregano, and basil. Let the sauce simmer for about 15-20 minutes, stirring occasionally. As it cooks, the tomatoes will break down, and the sauce will thicken and develop an amazing aroma that fills the kitchen. If you find the sauce too thick, add a bit of the reserved pasta water until it reaches your preferred consistency. Once the sauce is ready, toss in the cooked pasta and mix until every piece is coated with that delicious tomato goodness. The sauce will cling perfectly, giving each bite that homemade Italian flavor. Serve hot with a generous sprinkle of Parmesan and a few fresh basil leaves for garnish. This dish is a beautiful balance of simplicity and flavor—a real crowd-pleaser! Do you have a secret ingredient you like to add to your pasta tomato sauce? Share it below and inspire others to try something new! #PastaTomatoRecipe #ItalianPastaMagic #EasyTomatoPasta

Classic Pomodoro Pasta Recipe: Simple, Fresh, and Packed wit...
135 views · Nov 3, 2024 horoscopochino.co
Classic Pomodoro Pasta Recipe: Simple, Fresh, and Packed with Flavor Imagine a dish that’s light, fresh, and full of the rich taste of ripe tomatoes. That’s pasta pomodoro—a simple Italian classic that’s all about quality ingredients and perfect flavor. With this recipe, you’ll create a delicious pasta that’s easy to make but tastes like a special meal straight from a trattoria in Italy. This pomodoro pasta recipe serves four people and requires only a few fresh ingredients: 400g pasta (spaghetti or penne are great choices) 500g ripe tomatoes (San Marzano or Roma for best flavor) 3 tbsp olive oil 3 cloves of garlic, finely chopped Salt and black pepper to taste A handful of fresh basil leaves Freshly grated Parmesan cheese for serving To start, bring a large pot of salted water to a boil and cook the pasta until it’s al dente, about 8-10 minutes. Remember to save about a half-cup of the pasta water before draining it. This starchy water will help you adjust the sauce’s consistency later if needed. While the pasta is cooking, you’ll prepare the star of the show—the pomodoro sauce. Begin by heating olive oil in a large skillet over medium heat. Add the garlic and cook for just a minute until fragrant. Garlic adds a deep, aromatic base to the sauce, but be careful not to let it brown. Next, add the tomatoes. If using fresh tomatoes, it’s best to peel and crush them beforehand. This can be done by scoring an “X” on each tomato, blanching them in boiling water for 30 seconds, and then peeling off the skins. If you’re short on time, canned San Marzano tomatoes work beautifully as well. Season with salt and black pepper, and let the sauce simmer gently for about 15-20 minutes, stirring occasionally until it reduces slightly and the flavors come together. As the sauce cooks, add fresh basil leaves, tearing them into smaller pieces to release their aroma. Basil’s fresh, slightly peppery flavor elevates the tomatoes and gives the sauce its classic Italian taste. Once the sauce is ready, add the cooked pasta to the skillet and toss everything together. Use a bit of the reserved pasta water if you want a smoother, more cohesive sauce that coats each pasta strand perfectly. Serve the pomodoro pasta hot, topped with a sprinkle of freshly grated Parmesan and a few extra basil leaves for color. This dish is all about simple ingredients and pure flavors—a real testament to the beauty of Italian cooking. Share your ideas below and inspire others to add their own flair to this timeless recipe! #PomodoroPasta #ItalianClassic #FreshTomatoPasta

Perfect Homemade Pizza Dough Recipe for the Ultimate Pizza N...
20 views · Nov 3, 2024 horoscopochino.co
Perfect Homemade Pizza Dough Recipe for the Ultimate Pizza Night Have you ever wondered why pizzeria pizza dough is so addictively good? Now you can bring that magic right into your own kitchen! With this simple, no-fuss pizza dough recipe, you’ll be able to make a perfectly crispy, chewy crust that’ll make every bite unforgettable. Whether it’s family night or a personal treat, this dough is all about flavor and texture—and trust me, you’ll want to make it again and again. This recipe serves about four people and is easily adaptable if you’re cooking for a larger crowd. Here’s what you’ll need: 3 ½ cups all-purpose flour 1 ½ cups warm water (about 110°F or 45°C) 1 tsp active dry yeast 2 tbsp olive oil 1 tsp salt 1 tsp sugar Start by dissolving the yeast and sugar in the warm water. Let it sit for about 5 minutes until it’s foamy. This step activates the yeast, giving the dough its airy, light texture. Meanwhile, mix the flour and salt in a large bowl. Create a well in the center and pour in the yeast mixture and olive oil. Stir it all together with a wooden spoon until a shaggy dough forms. Now, it’s time to get your hands dirty! Turn the dough onto a lightly floured surface and knead it for about 8-10 minutes. You’ll know it’s ready when it feels smooth and elastic. Kneading is key—it develops the gluten that makes your dough stretchy and gives it that satisfying chew. Once kneaded, place the dough in an oiled bowl, cover it with a clean cloth, and let it rise in a warm spot for 1-2 hours, or until it doubles in size. This resting period is where the magic happens; the dough develops flavor and becomes easier to stretch into that classic pizza shape. When ready to use, punch down the dough gently to release any air bubbles. Divide it into two equal portions for two medium pizzas or keep it whole for a large, family-style pie. Roll it out on a floured surface to your desired thickness, and it’s ready to top with your favorite ingredients. Pop it in the oven at 475°F (245°C) for 10-12 minutes, and voila—perfect, homemade pizza with a crust that’ll have everyone reaching for another slice. What toppings are you going to try on your homemade crust? Let us know, and inspire others to get creative with their pizza night! #PerfectPizzaDough #HomemadePizzaMagic #UltimatePizzaNight
Simple and Delicious Spaghetti with Garlic and Olive Oil Rec...
94 views · Nov 3, 2024 horoscopochino.co
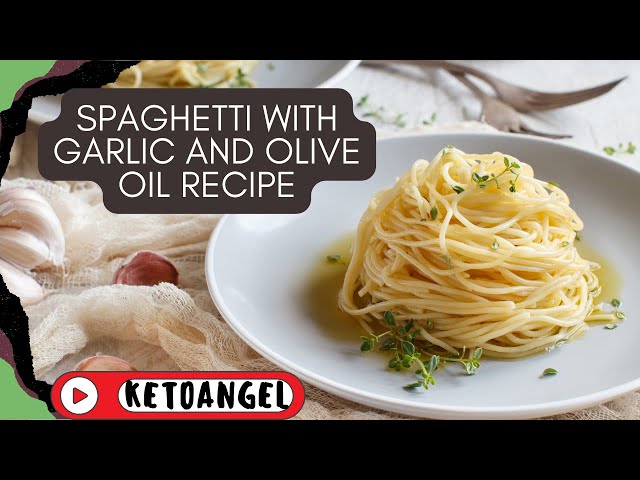
Simple and Delicious Spaghetti with Garlic and Olive Oil Recipe Craving something simple yet absolutely delicious? Spaghetti with garlic and olive oil, also known as "spaghetti aglio e olio," is the answer. This Italian classic is a celebration of simplicity, letting quality ingredients shine. Perfect for a quick weeknight meal or a cozy dinner for two, this dish packs flavor without the fuss. This recipe serves two, making it ideal for a small dinner or an indulgent solo meal with leftovers. Here’s what you need: 200g spaghetti 4 large cloves of garlic, thinly sliced 4 tbsp olive oil (extra-virgin for the best flavor) 1/4 tsp red pepper flakes (optional, for a little heat) Salt, to taste Fresh parsley, chopped, for garnish Freshly grated Parmesan, for serving (optional but recommended) Start by cooking the spaghetti in a large pot of salted boiling water until al dente, about 8-10 minutes. Reserve about a cup of the pasta cooking water before draining the spaghetti; this starchy water is the secret to achieving a silky, cohesive sauce. While the pasta is cooking, heat the olive oil in a large skillet over medium heat. Add the sliced garlic and red pepper flakes, cooking gently until the garlic turns golden and fragrant. Be careful not to let the garlic burn—this would make it bitter. Instead, you want it to infuse the oil, giving the dish its rich, garlicky flavor. Once the garlic is perfectly golden, turn off the heat temporarily to prevent it from cooking further. Now, add the cooked spaghetti directly into the skillet, tossing it well in the garlicky olive oil. If the pasta seems dry, add a little of the reserved pasta water, a tablespoon at a time, until the sauce is smooth and coats the spaghetti just right. Season with salt to taste, and sprinkle in some freshly chopped parsley for a burst of color and freshness. Serve your spaghetti hot, with a sprinkle of Parmesan cheese if you’re looking for a slightly richer flavor. The Parmesan adds a nutty note that beautifully complements the garlic and olive oil. This simple spaghetti with garlic and olive oil is proof that sometimes the best dishes don’t require complicated ingredients. It’s quick, flavorful, and has a sophistication that makes it feel restaurant-worthy. Have a favorite twist for this classic dish? Add your ideas in the comments and inspire others to get creative with spaghetti aglio e olio! #2024 #SpaghettiAglioEOlio #deliciusfood #spaguetti #simplepastarecipe #GarlicLoversPasta
Simple and Delicious Spaghetti with Garlic and Olive Oil Rec...
94 views · Nov 3, 2024 horoscopochino.co
Simple and Delicious Spaghetti with Garlic and Olive Oil Recipe Craving something simple yet absolutely delicious? Spaghetti with garlic and olive oil, also known as "spaghetti aglio e olio," is the answer. This Italian classic is a celebration of simplicity, letting quality ingredients shine. Perfect for a quick weeknight meal or a cozy dinner for two, this dish packs flavor without the fuss. This recipe serves two, making it ideal for a small dinner or an indulgent solo meal with leftovers. Here’s what you need: 200g spaghetti 4 large cloves of garlic, thinly sliced 4 tbsp olive oil (extra-virgin for the best flavor) 1/4 tsp red pepper flakes (optional, for a little heat) Salt, to taste Fresh parsley, chopped, for garnish Freshly grated Parmesan, for serving (optional but recommended) Start by cooking the spaghetti in a large pot of salted boiling water until al dente, about 8-10 minutes. Reserve about a cup of the pasta cooking water before draining the spaghetti; this starchy water is the secret to achieving a silky, cohesive sauce. While the pasta is cooking, heat the olive oil in a large skillet over medium heat. Add the sliced garlic and red pepper flakes, cooking gently until the garlic turns golden and fragrant. Be careful not to let the garlic burn—this would make it bitter. Instead, you want it to infuse the oil, giving the dish its rich, garlicky flavor. Once the garlic is perfectly golden, turn off the heat temporarily to prevent it from cooking further. Now, add the cooked spaghetti directly into the skillet, tossing it well in the garlicky olive oil. If the pasta seems dry, add a little of the reserved pasta water, a tablespoon at a time, until the sauce is smooth and coats the spaghetti just right. Season with salt to taste, and sprinkle in some freshly chopped parsley for a burst of color and freshness. Serve your spaghetti hot, with a sprinkle of Parmesan cheese if you’re looking for a slightly richer flavor. The Parmesan adds a nutty note that beautifully complements the garlic and olive oil. This simple spaghetti with garlic and olive oil is proof that sometimes the best dishes don’t require complicated ingredients. It’s quick, flavorful, and has a sophistication that makes it feel restaurant-worthy. Have a favorite twist for this classic dish? Add your ideas in the comments and inspire others to get creative with spaghetti aglio e olio! #2024 #SpaghettiAglioEOlio #deliciusfood #spaguetti #simplepastarecipe #GarlicLoversPasta
Simple Yet Delicious Pasta with Tomato Sauce You’ll Love t...
13 views · Nov 2, 2024 horoscopochino.co
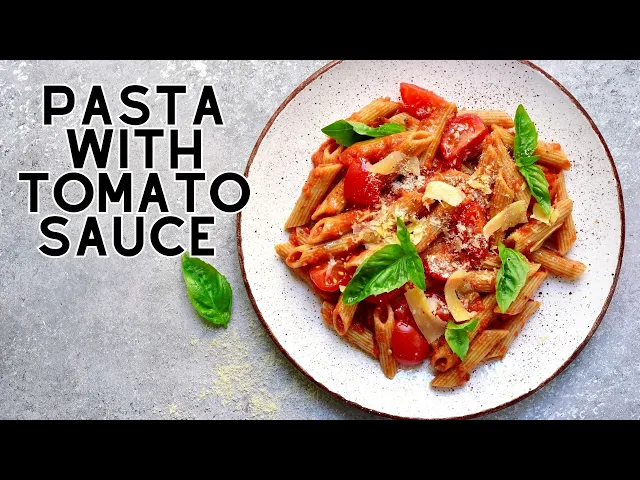
Simple Yet Delicious Pasta with Tomato Sauce You’ll Love to Make Imagine a plate of pasta coated in a rich, flavorful tomato sauce, topped with a sprinkle of Parmesan and fresh basil—it’s the ultimate comfort food, and the best part? It’s so easy to make! This pasta with tomato sauce recipe is perfect for weeknights when you want something delicious, satisfying, and quick to put together. This recipe makes enough for four servings, making it great for a family dinner or for meal prep. Here’s what you’ll need: 400g of pasta (spaghetti, penne, or your favorite shape) 1 can (400g) of crushed tomatoes 1 small onion, finely chopped 2 cloves of garlic, minced 2 tbsp olive oil 1 tsp sugar Salt and black pepper to taste 1 tsp dried oregano Fresh basil leaves or 1 tsp dried basil Freshly grated Parmesan cheese, for serving Let’s start by cooking the pasta in a large pot of boiling salted water until it’s al dente (about 8-10 minutes, depending on the pasta). While the pasta cooks, you’ll have plenty of time to make the sauce. To make the tomato sauce, heat the olive oil in a large skillet over medium heat. Add the chopped onion and cook until it’s soft and translucent, about 3-4 minutes. This adds a sweet depth to the sauce. Then, add the minced garlic and cook for just a minute—enough to release that delicious garlic aroma without browning it. Now, pour in the crushed tomatoes and give it a good stir. Season with salt, pepper, and a teaspoon of sugar to balance out the tomatoes’ acidity. Add dried oregano and basil for an herby flavor that makes the sauce taste even richer and more authentic. Let it simmer gently for 15-20 minutes, stirring occasionally. As the sauce cooks, it’ll thicken and the flavors will meld into a delicious blend. Once your sauce is ready, add the cooked pasta to the skillet and toss until every piece is coated with that amazing tomato sauce. If the sauce seems a bit thick, you can add a splash of the pasta cooking water to achieve the perfect consistency. Serve your pasta with tomato sauce hot, topped with freshly grated Parmesan and a few basil leaves for extra color and flavor. It’s simple, hearty, and a crowd-pleaser that’ll have everyone coming back for seconds. What toppings or extra ingredients do you like to add to your pasta with tomato sauce? Let us know and inspire others to try something new! #PastaWithTomatoSauce #ItalianComfortFood #easypastarecipe

Transform Your Dinner with This Tender, Flavorful Duck Breas...
0 views · Nov 2, 2024 horoscopochino.co
Transform Your Dinner with This Tender, Flavorful Duck Breast Recipe Ever wanted to cook a meal that instantly makes you feel like a gourmet chef? Duck breast is that recipe—rich, juicy, and full of flavor that turns any meal into a special occasion. If you’re looking to impress your friends or treat yourself to something extraordinary, this duck breast recipe will change the way you think about home cooking. It’s easy, quick, and, best of all, it tastes as if it came from a five-star restaurant. This recipe serves 2 people and requires only a few ingredients, making it perfect for a romantic dinner or an indulgent solo feast. Here’s what you’ll need: 2 duck breasts (approximately 180g each) 1 tsp salt ½ tsp black pepper 1 sprig of fresh thyme 2 cloves of garlic, crushed 1 tbsp olive oil 1 tbsp butter 1 tbsp balsamic vinegar (optional, for a slightly sweet glaze) To start, ensure your duck breasts are at room temperature, as this helps them cook evenly. Pat them dry with a paper towel, then score the skin in a criss-cross pattern, making sure not to cut into the meat. Season both sides generously with salt and pepper. This scoring allows the fat to render out beautifully, creating a crispy skin and tender meat. Trust me—this step makes all the difference. Heat a skillet over medium-high heat. Once it’s hot, place the duck breasts skin-side down without adding any oil (duck releases its own fat). Cook for about 6-8 minutes until the skin is golden brown and crispy. The aroma alone will get your mouth watering. Once the skin is crisp, flip the breasts and cook the other side for 3-4 minutes for a medium-rare finish. Now for a little extra flair: toss in the crushed garlic, fresh thyme, and a tablespoon of butter. Baste the duck by tilting the pan slightly and using a spoon to pour the buttery juices over the meat. If you’d like, add a splash of balsamic vinegar at this point for a sweet, tangy glaze that complements the richness of the duck. After cooking, let the duck rest for 5 minutes before slicing. This keeps the juices locked in and enhances the tenderness. Slice it thinly and serve with a side of roasted vegetables or mashed potatoes. The crispy skin, succulent meat, and hint of garlic will make this dish the highlight of your week. Have you ever tried cooking duck breast at home? Share your experience, or let us know how this recipe turned out! #DuckBreastMasterpiece #HomeChefSecrets #GourmetAtHome

Spaghetti with Shrimps: A Quick, Flavor- Packed Recipe for S...
223 views · Nov 2, 2024 horoscopochino.co
Spaghetti with Shrimps: A Quick, Flavor-Packed Recipe for Seafood Lovers Imagine twirling a forkful of perfectly cooked spaghetti coated in a rich, garlicky sauce, topped with tender, juicy shrimp. Spaghetti with shrimps is the ultimate seafood comfort food, perfect for a cozy night in or a casual dinner with friends. This recipe is easy to make but tastes gourmet, giving you a taste of the ocean with a touch of Italian elegance. This recipe serves two, making it ideal for a romantic dinner or a solo indulgence with leftovers. Here’s what you’ll need: 200g spaghetti 250g shrimp, peeled and deveined 3 tbsp olive oil 3 cloves of garlic, minced 1/4 tsp red pepper flakes (optional for a little heat) Salt and black pepper, to taste 1/4 cup dry white wine or chicken broth Fresh parsley, chopped, for garnish Freshly grated Parmesan, for serving (optional) Start by cooking the spaghetti in a large pot of salted boiling water until it’s al dente, around 8-10 minutes. Save a cup of pasta water before draining; you might need it to help create the perfect sauce consistency later on. While the pasta is cooking, heat 1 tablespoon of olive oil in a large skillet over medium heat. Add the shrimp in a single layer, seasoning them with salt and pepper. Cook the shrimp for about 2-3 minutes on each side until they’re pink and opaque. Once done, remove them from the skillet and set them aside. In the same skillet, add the remaining olive oil along with the minced garlic and red pepper flakes. Sauté for about a minute until fragrant, but be careful not to let the garlic brown. Add the white wine (or chicken broth), scraping the bottom of the pan to release any flavorful bits. Let the mixture simmer for a couple of minutes to reduce slightly. Now, return the cooked shrimp to the skillet, add the drained spaghetti, and toss everything together. If the sauce seems too thick, add a splash of the reserved pasta water until the sauce lightly coats the pasta. This trick not only adds moisture but also helps bind the sauce to the spaghetti. Serve your shrimp spaghetti hot, topped with fresh parsley and a sprinkle of Parmesan if desired. The combination of garlic, olive oil, and wine (or broth) brings out the natural sweetness of the shrimp, making every bite irresistible. Do you have a secret ingredient or twist for shrimp spaghetti? Share it below and inspire others to take their dish to the next level! #2024 #spaguetti #ShrimpSpaghetti #seafoodpasta #QuickShrimpRecipe

Authentic Kung Pao Chicken Recipe: Spicy, Sweet, and Addicti...
34 views · Nov 2, 2024 horoscopochino.co
Authentic Kung Pao Chicken Recipe: Spicy, Sweet, and Addictively Delicious If you’re a fan of bold flavors, you’ll love Kung Pao Chicken—a classic Chinese dish known for its savory, spicy, and slightly sweet taste that’s perfectly balanced. Imagine tender chicken bites, crunchy peanuts, and vibrant bell peppers all coated in a glossy, flavorful sauce. This recipe will let you recreate the takeout favorite at home in no time! This recipe serves four people, making it perfect for a family dinner or meal prep for the week. Here’s what you’ll need: 1 lb (450g) boneless, skinless chicken thighs or breasts, diced 1/2 cup peanuts (unsalted, roasted) 1 red bell pepper, chopped 3 green onions, chopped 3 dried red chilies, whole (adjust for spice preference) 3 tbsp vegetable oil For the marinade: 1 tbsp soy sauce 1 tbsp rice wine or dry sherry 1 tsp cornstarch For the sauce: 2 tbsp soy sauce 1 tbsp hoisin sauce 1 tbsp rice vinegar 1 tbsp sugar 1/2 tbsp sesame oil 1 tsp cornstarch Start by marinating the chicken. In a mixing bowl, combine the soy sauce, rice wine, and cornstarch, then add the diced chicken. Toss to coat and let it sit for about 10 minutes. This marinade will keep the chicken tender and flavorful while it cooks. While the chicken marinates, prepare the sauce. In a small bowl, whisk together the soy sauce, hoisin sauce, rice vinegar, sugar, sesame oil, and cornstarch. This sauce is the perfect balance of sweet, tangy, and savory with a hint of nuttiness from the sesame oil. Now, it’s time to cook! Heat the vegetable oil in a large skillet or wok over medium-high heat. Add the dried red chilies and stir-fry for about 30 seconds until they release a fragrant, smoky aroma (just be careful not to burn them!). Then, add the marinated chicken and cook for about 5-6 minutes until browned and cooked through. Add the chopped red bell pepper, green onions, and peanuts to the skillet, stirring for 2-3 minutes until the vegetables are slightly tender and the peanuts are toasted. Pour in the sauce, stirring constantly to coat all the ingredients in that delicious glaze. Cook for another 1-2 minutes, allowing the sauce to thicken slightly. Serve your Kung Pao Chicken hot over steamed rice for the full experience. Each bite is a delightful mix of textures and flavors that’s sure to impress. Do you have a favorite way to customize Kung Pao Chicken? Share your tips below and inspire others to make this dish even better! #2024 #kungpaochicken #ChineseTakeoutAtHome #spicychickenrecipe

Hearty Vegetable Beef Soup Recipe You’ll Fall in Love With
1K views · Oct 29, 2024 horoscopochino.co
Hearty Vegetable Beef Soup Recipe You’ll Fall in Love With Craving something warm, filling, and absolutely delicious? This Hearty Vegetable Beef Soup recipe is everything you need to warm your soul and fill your belly! Whether you're looking for a satisfying meal for the family or something comforting for a chilly evening, this dish has got you covered. With chunks of tender beef, fresh vegetables, and a rich, savory broth, it’s a recipe that will quickly become a favorite in your kitchen. This soup has everything going for it: simplicity, deep flavor, and plenty of wholesome ingredients. Perfect for a weeknight dinner or a special weekend meal, it combines the richness of beef with the nutritious punch of vibrant vegetables. You won’t believe how quickly it comes together, and even better—how incredibly satisfying it is! To make this, you’ll need the following ingredients (enough for 6-8 servings): 1 ½ lbs beef stew meat, cut into bite-sized pieces 2 tbsp olive oil 1 large onion, diced 3 cloves garlic, minced 4 carrots, peeled and chopped 3 celery stalks, chopped 3 potatoes, diced 2 cups green beans, trimmed and cut into 1-inch pieces 1 cup frozen corn 1 cup frozen peas 1 can (15 oz) diced tomatoes, with juices 6 cups beef broth 2 tsp dried thyme 1 bay leaf Salt and pepper to taste Fresh parsley for garnish Now, let’s get cooking! Start by heating the olive oil in a large pot over medium-high heat. Once hot, add the beef stew meat and brown on all sides. This step is key for locking in that rich beef flavor! Once browned, remove the meat and set it aside. In the same pot, add the diced onion, garlic, carrots, and celery. Sauté until the vegetables are softened, about 5 minutes. Next, return the beef to the pot and pour in the beef broth. Add the potatoes, green beans, diced tomatoes (with the juices), thyme, and bay leaf. Bring everything to a simmer, then reduce the heat to low and cover. Let it cook for about 1 hour, stirring occasionally, until the beef is tender and the flavors have melded together beautifully. About 15 minutes before serving, stir in the frozen peas and corn. They don’t need long to cook, and this ensures they stay bright and fresh in the soup. Taste your soup and season with salt and pepper as needed. Before serving, remove the bay leaf and sprinkle fresh parsley over the top for a burst of color and added freshness. The result? A robust, hearty vegetable beef soup that's packed with flavor and perfect for feeding a crowd. Serve it with some crusty bread on the side, and you've got a meal everyone will rave about! Ready to try this comforting recipe for yourself? What other vegetables would you add to make it your own? #2024 #souprecipe #beefsouprecipe #BeefSoupPerfection #ComfortInABowl #HeartySoupForTheSoul

Become a Pizza Master with This Simple and Delicious Tomato ...
60 views · Oct 27, 2024 horoscopochino.co
Become a Pizza Master with This Simple and Delicious Tomato Sauce Recipe! Are you ready to take your homemade pizza to the next level? One of the secrets to a perfect pizza lies in the sauce. With this easy, flavorful tomato sauce recipe, you’ll be making pizza like a true pro in no time! Say goodbye to store-bought sauces and hello to fresh, vibrant flavors that will elevate every bite of your pizza. This recipe makes enough sauce for 4-6 medium-sized pizzas, so it’s great for family pizza night or even a small gathering of friends. Ingredients You’ll Need: 2 cups of canned whole peeled tomatoes (San Marzano if possible) 2 tablespoons of extra virgin olive oil 2 garlic cloves, minced 1 teaspoon of dried oregano ½ teaspoon of sugar Salt and pepper to taste 4-5 fresh basil leaves (optional, but highly recommended) 1 tablespoon of tomato paste (optional, for extra richness) Let’s Create the Perfect Sauce: Start by heating the olive oil in a medium saucepan over medium heat. Add the minced garlic and sauté for just 30 seconds or until fragrant, being careful not to let it burn. That initial burst of garlic flavor is going to set the tone for your sauce! Next, add the canned tomatoes, crushing them gently with your hands or a spoon as you pour them in. This creates a nice rustic texture that’s perfect for pizza. Stir in the dried oregano, sugar, and a pinch of salt and pepper. The sugar balances the acidity of the tomatoes, while the oregano gives it that classic pizza flavor. Let the sauce simmer gently for 20-30 minutes, stirring occasionally. This will allow the flavors to meld together and the sauce to thicken slightly. If you want a richer sauce, you can stir in a tablespoon of tomato paste at this point. For a fresh twist, add a few basil leaves in the last 5 minutes of cooking. They add a lovely, subtle aroma that pairs perfectly with the other ingredients. Once the sauce has cooled a bit, you can use it directly on your pizza dough, spreading it evenly before adding your toppings. Trust me, this sauce will make your pizza stand out with its deep, rich flavor and perfect consistency. Ready to wow your friends and family with your pizza-making skills? What will you put on top of your homemade masterpiece? #2024 #tomatosauce #tomatosaucerecipe #pizzasaucerecipe #pizzasauce #homemadepizza #homemadepizzasaucerecipe #TomatoSauceMasterpiece

Become a Portuguese Linguica Master in 24 Hours: Easy Recipe...
373 views · Oct 26, 2024 horoscopochino.co
Become a Portuguese Linguica Master in 24 Hours: Easy Recipe & Tips Ever wanted to make authentic Portuguese linguica at home but thought it was too difficult? Think again! In just 24 hours, you can master this flavorful sausage that’s perfect for grilling, stews, or even breakfast. With a few fresh ingredients and some simple techniques, you’ll soon be serving up homemade linguica that will have everyone asking for seconds. Let’s dive into the secret of making delicious Portuguese linguica from scratch. The key to linguica is the spice blend, which gives it its signature flavor. You’ll need pork shoulder, garlic, paprika, and a few other essential seasonings. Don’t worry, the process is easier than you might think, and the reward is absolutely worth it. Whether you want to impress friends at a BBQ or enjoy it with your eggs in the morning, this recipe will make you a linguica master in no time. For this recipe, which yields enough linguica for 6-8 people, you’ll need: 1 kg (2.2 lbs) of pork shoulder, finely chopped or ground 5 cloves of garlic, minced 2 tablespoons of smoked paprika 1 tablespoon of sweet paprika 1 tablespoon of crushed red pepper flakes (adjust to taste) 1 tablespoon of salt 1 teaspoon of freshly ground black pepper 100 ml (1/2 cup) of red wine 1/4 cup of red wine vinegar Natural hog casings (optional, for stuffing) To start, combine all the ingredients in a large bowl and mix thoroughly. The pork should be evenly coated with the spices and the red wine mixture. Let it marinate in the fridge for 24 hours to allow the flavors to develop fully. If you want to go the extra mile, use natural hog casings to stuff the mixture, creating traditional sausage links. Soak the casings in water for about 30 minutes, then rinse thoroughly. Using a sausage stuffer or a funnel, fill the casings with the pork mixture, being careful not to overfill them. Twist into 6-inch links and tie off the ends. After the marinating process, the linguica is ready to cook! You can grill it, bake it, or slice it into a stew for that rich, smoky flavor. It’s a truly versatile sausage that elevates any dish. Ready to impress your friends and family with your homemade Portuguese linguica? Share your cooking adventure with us in the comments! What’s your favorite way to serve this tasty sausage? #2024 #linguicamastery #portuguesesausagesuccess #HomemadeLinguica #linguiça #linguiçaartesanal

Easy Tomato Spaghetti Recipe: A Quick and Delicious Dinner I...
154 views · Oct 24, 2024 horoscopochino.co
Easy Tomato Spaghetti Recipe: A Quick and Delicious Dinner Idea for Tonight Need a quick, tasty, and satisfying meal that doesn’t take hours to prepare? Look no further than this easy tomato spaghetti recipe! In just 20 minutes, you can have a delicious dinner on the table that everyone will love. It’s perfect for those busy weeknights when time is tight, but you still crave something comforting and homemade. The beauty of this recipe is in its simplicity. With a few basic ingredients that you probably already have in your pantry, you’ll be able to whip up a restaurant-quality dish in no time. Plus, it’s light, fresh, and packed with flavor. The magic lies in the combination of juicy tomatoes, fragrant garlic, and a touch of olive oil. Let’s get started! For this recipe, which serves four people, you'll need the following ingredients: 400 grams (14 oz) of spaghetti 3 tablespoons of olive oil 4 garlic cloves, minced 400 grams (14 oz) of canned diced tomatoes (or fresh tomatoes if you prefer) 1 teaspoon of dried oregano A pinch of red pepper flakes (optional for a little heat) Salt and pepper to taste Fresh basil leaves for garnish Grated Parmesan cheese (optional) Start by cooking the spaghetti in salted boiling water according to the package instructions, usually about 8-10 minutes, until al dente. While the pasta is cooking, heat the olive oil in a large skillet over medium heat. Add the minced garlic and sauté for about 1-2 minutes until fragrant, but be careful not to burn it. Next, stir in the diced tomatoes, oregano, red pepper flakes, and season with salt and pepper. Let it simmer for about 5-7 minutes, stirring occasionally, until the sauce thickens slightly. You can add a splash of pasta water to the sauce to give it a more velvety texture. Once the spaghetti is ready, drain it and toss it into the skillet with the tomato sauce. Mix everything well so that the pasta is evenly coated with the sauce. Garnish with fresh basil and serve with a generous sprinkle of grated Parmesan. This quick and easy meal is not only budget-friendly but also incredibly versatile. You can add your favorite vegetables or proteins like grilled chicken or shrimp to make it heartier. So, what’s stopping you from giving this a try tonight? Let us know how it turned out in the comments below! What’s your favorite twist on a classic spaghetti dish? #2024 #tomatospaghetti #QuickPastaFix #TomatoSpaghettiDelight #EasyWeeknightPasta #pastarecipe #easyrecipe

Ultimate Filling Chicken Lo Mein Recipe for a Hungry Night
282 views · Oct 24, 2024 horoscopochino.co
Ultimate Filling Chicken Lo Mein Recipe for a Hungry Night Had a long day and need a hearty, satisfying meal to fill you up? Look no further than this ultimate chicken lo mein recipe. It’s packed with tender chicken, flavorful veggies, and thick noodles tossed in a savory sauce that will cure any hunger pangs. The best part? It’s quick to make, and you'll only need one pan to get the job done. Forget takeout—this homemade lo mein is better, fresher, and way more satisfying. The secret to a great lo mein is all about balance. You want juicy chicken, a mix of crunchy and soft vegetables, and that perfect sauce to tie everything together. Whether you’re craving comfort food or just need something to whip up fast, this lo mein recipe has got you covered. Here’s what you’ll need to serve 4 hungry people: 300 grams (10 oz) of lo mein noodles or spaghetti 500 grams (1 lb) of chicken breast, thinly sliced 2 tablespoons of vegetable oil 1 onion, sliced 2 bell peppers, thinly sliced 2 medium carrots, julienned 1 cup of broccoli florets 3 garlic cloves, minced 1/4 cup of soy sauce 2 tablespoons of oyster sauce 1 tablespoon of hoisin sauce 1 tablespoon of sesame oil 1 teaspoon of sugar Salt and pepper to taste Green onions and sesame seeds for garnish Start by cooking your lo mein noodles or spaghetti according to package instructions. Once they’re done, drain and set them aside. In a large skillet or wok, heat 1 tablespoon of vegetable oil over medium heat. Add the sliced chicken, season with salt and pepper, and cook until golden brown and fully cooked, about 5-7 minutes. Remove the chicken from the pan and set aside. In the same pan, add the remaining tablespoon of oil and toss in the sliced onion, bell peppers, carrots, and broccoli. Sauté for 3-4 minutes, until the veggies are slightly tender but still have some crunch. Add the minced garlic and cook for another minute. Next, add the cooked chicken back into the pan and pour in the soy sauce, oyster sauce, hoisin sauce, sesame oil, and sugar. Toss everything together to coat the chicken and vegetables in the savory sauce. Finally, stir in the cooked noodles and toss until everything is well combined. Serve your chicken lo mein hot, garnished with fresh green onions and sesame seeds for that extra touch. Hungry yet? Give this ultimate chicken lo mein a try and tell us in the comments—did you enjoy it as much as your favorite takeout? What tweaks did you make to make it your own? #2024 #chickenlomein #lomein #UltimateChickenLoMein #LoMeinForHungryNights #BetterThanTakeoutLoMein

The Ultimate Lasagna Recipe (Better Than Any Restaurant'...
184 views · Oct 24, 2024 horoscopochino.co
The Ultimate Lasagna Recipe (Better Than Any Restaurant's!) Ever dreamt of making a lasagna so rich, flavorful, and cheesy that it rivals any dish you’ve ever had at a restaurant? Well, you’re in luck! This ultimate lasagna recipe will become your new go-to comfort meal, and trust me, once you try it, you won’t want to order lasagna at a restaurant again. It's got layers of perfectly seasoned meat sauce, creamy ricotta, and gooey melted cheese, all baked to perfection. Ready to dive in? Let’s break it down. Lasagna is all about building layers of flavor, and that’s exactly what makes this recipe unbeatable. We’ll start with a savory meat sauce, followed by the cheese mixture, and of course, perfectly cooked lasagna noodles. It’s a bit of effort, but the result is totally worth it—this recipe will feed 8 people easily and leave everyone wanting seconds. Here’s what you’ll need: 500 grams (1 lb) of ground beef 500 grams (1 lb) of Italian sausage 1 onion, finely chopped 3 garlic cloves, minced 2 cans (400g each) of crushed tomatoes 1 can (170g) of tomato paste 1 can (400g) of tomato sauce 2 tablespoons of sugar 2 teaspoons of dried basil 1 teaspoon of dried oregano Salt and pepper to taste 12 lasagna noodles 450 grams (16 oz) of ricotta cheese 2 cups (200g) of shredded mozzarella cheese 1/2 cup (50g) of grated Parmesan cheese 1 egg, beaten Fresh basil for garnish Start by making the meat sauce. In a large skillet, cook the ground beef, Italian sausage, chopped onion, and minced garlic over medium heat until browned. Drain the excess fat. Stir in the crushed tomatoes, tomato paste, tomato sauce, sugar, basil, oregano, salt, and pepper. Simmer for at least 30 minutes to let the flavors meld together. While the sauce is simmering, cook your lasagna noodles according to package instructions. Drain and set aside. In a medium bowl, combine the ricotta cheese, beaten egg, Parmesan, and a pinch of salt. Stir until smooth. Now, it's time to assemble the lasagna! In a large baking dish, start by spreading a thin layer of meat sauce. Then add a layer of noodles, followed by the ricotta mixture, and a sprinkle of mozzarella. Repeat these layers until you run out of ingredients, finishing with a generous layer of mozzarella on top. Cover the lasagna with aluminum foil and bake at 175°C (350°F) for 25 minutes. Then, uncover and bake for an additional 25 minutes until the cheese is golden and bubbly. Let it rest for 10 minutes before slicing. Craving that perfect slice of lasagna? Try this at home and let us know in the comments if it beats your favorite restaurant version! What’s your secret to making the best lasagna? #2024 #lasagnarecipe #ultimatelasagnamagic #BetterThanRestaurantLasagna #cheesylasagna

5 Minute Carbonara Recipe - Easy Pasta Cooking Hack You Need...
7 views · Oct 24, 2024 horoscopochino.co
5 Minute Carbonara Recipe - Easy Pasta Cooking Hack You Need Tonight Craving something delicious but short on time? This 5-minute carbonara recipe will be your new best friend in the kitchen! With just a handful of ingredients, you can whip up a classic Italian dish that’s creamy, savory, and loaded with flavor. Forget about spending hours in the kitchen—this quick and easy carbonara hack will give you restaurant-quality pasta in no time. The secret to a perfect carbonara is its simplicity. No need for cream here—just a rich egg mixture, some salty pancetta (or bacon), and freshly grated Parmesan cheese. In this version, we’ll have you ready to eat in five minutes flat. It’s ideal for those busy weeknights when you want something comforting but don’t have the luxury of time. This recipe serves two people, but you can easily double it if needed. Here’s what you’ll need: 200 grams (7 oz) of spaghetti or any pasta you prefer 100 grams (3.5 oz) of pancetta or bacon, diced 2 large eggs 1/2 cup (50 grams) of grated Parmesan cheese 1 garlic clove, minced (optional) Salt and freshly ground black pepper to taste A handful of fresh parsley (optional, for garnish) First, start by cooking the pasta in a pot of boiling salted water. While the pasta is cooking, heat a small skillet over medium heat and add the diced pancetta or bacon. Cook for about 3-4 minutes until crispy. If you love garlic, throw in the minced garlic during the last minute of cooking for extra flavor. In a bowl, whisk together the eggs and grated Parmesan until smooth. Add a good pinch of black pepper to the mixture—this is where a lot of that authentic flavor comes from. As soon as the pasta is done, reserve a little bit of the pasta water and drain the rest. Quickly toss the hot pasta into the pan with the pancetta, remove from heat, and immediately pour the egg mixture over the pasta. Toss everything together vigorously, adding a little reserved pasta water if the sauce feels too thick. The heat from the pasta will cook the eggs, creating that creamy carbonara sauce everyone loves. Serve immediately, topped with a sprinkle of fresh parsley if you like. How easy was that? Let us know in the comments if you tried this quick carbonara hack! What’s your favorite pasta dish to make when you’re in a hurry? #2024 #carbonararecipe #carbonara #carbonarapasta #5minutecarbonara #quickpastarecipe #easycarbonararecipe
HEALTHY Vegetarian Stir Fry Recipe With Chickpeas, Quinoa, a...
512 views · Oct 24, 2024 horoscopochino.co
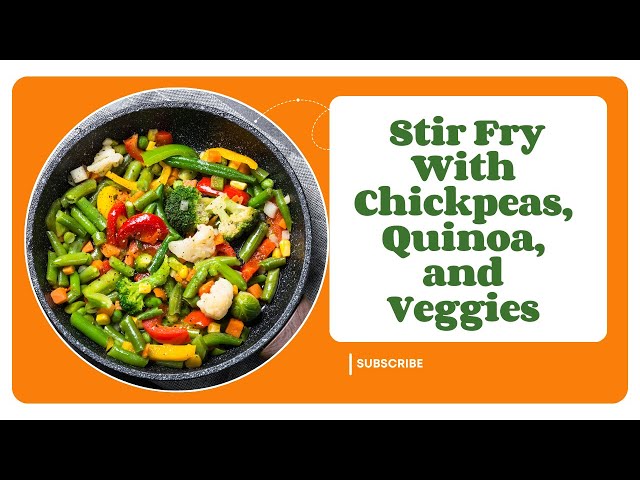
HEALTHY Vegetarian Stir Fry Recipe With Chickpeas, Quinoa, and Veggies! Looking for a healthy, filling meal that’s packed with protein and flavor? This vegetarian stir fry with chickpeas, quinoa, and veggies is exactly what you need! It’s quick, delicious, and loaded with nutrients—perfect for anyone looking for a meat-free dish that doesn’t compromise on taste. Whether you're trying to eat more plant-based meals or just want something light yet satisfying, this stir fry will become your new go-to recipe. The best part about this dish is that it’s super customizable! Use whatever veggies you have on hand and toss them together with wholesome quinoa and protein-packed chickpeas. It’s great for meal prep, or when you need a quick dinner that’s ready in less than 30 minutes. This recipe makes about 4 servings, enough for a small family dinner or a few meal-prepped lunches. Here’s what you’ll need: 1 cup of quinoa, rinsed 1 can (400g) of chickpeas, drained and rinsed 2 tablespoons of olive oil 1 bell pepper, sliced 1 zucchini, sliced 1 cup of broccoli florets 2 carrots, julienned 3 garlic cloves, minced 2 tablespoons of soy sauce (or tamari for gluten-free) 1 tablespoon of sesame oil 1 tablespoon of lemon juice Salt and pepper to taste Fresh cilantro or green onions for garnish (optional) Start by cooking the quinoa. Add 1 cup of quinoa to 2 cups of water in a pot. Bring it to a boil, then reduce the heat and simmer for 15 minutes, or until all the water is absorbed. Fluff with a fork and set aside. While the quinoa is cooking, heat the olive oil in a large pan or wok over medium heat. Add the garlic and cook for about 1 minute until fragrant. Then toss in the bell pepper, zucchini, broccoli, and carrots. Stir fry for about 5-7 minutes, until the veggies are tender but still crisp. Next, add the chickpeas to the pan and cook for another 2 minutes to warm them through. Drizzle the soy sauce, sesame oil, and lemon juice over the veggies and chickpeas, stirring well to coat everything evenly. Season with salt and pepper to taste. Once the stir fry is ready, serve it over the cooked quinoa and garnish with fresh cilantro or green onions if you like. Healthy, delicious, and easy—this veggie stir fry is perfect for any weeknight dinner. Ready to give it a try? Let us know in the comments how it turned out and what veggies you used! #HealthyVeggieStirFry #ChickpeaQuinoaMagic #vegetarianmealprep

Royal Cheesecake Delight: The Ultimate No Bake Cheesecake Re...
104 views · Oct 24, 2024 horoscopochino.co
Royal Cheesecake Delight: The Ultimate No-Bake Cheesecake Recipe You’ll Love Craving a dessert that’s rich, creamy, and feels like royalty, but don’t want to deal with the hassle of baking? I’ve got just the thing for you! This No-Bake Cheesecake recipe is so decadent and velvety smooth, it’s fit for a king (or queen)! The best part? No oven required, and it’s perfect for anyone looking for an elegant dessert without spending hours in the kitchen. Let’s take this regal dessert to the next level! This recipe serves 8-10 people, making it perfect for gatherings, special occasions, or even a quiet treat-yourself night. Ingredients You’ll Need: 2 cups of crushed graham crackers (or digestive biscuits) ½ cup of unsalted butter, melted 3 cups of cream cheese, softened 1 cup of powdered sugar 1 teaspoon of vanilla extract 1 ½ cups of heavy cream, whipped 1 tablespoon of lemon juice Fresh berries (strawberries, blueberries, raspberries) for garnish Optional: Chocolate shavings or fruit syrup for drizzling Let’s Get Started: First, we’ll make the crust. Combine your crushed graham crackers with the melted butter until it resembles wet sand. Press this mixture firmly into the bottom of a springform pan (9-inch) and chill in the fridge for at least 30 minutes. This will set the foundation for your cheesecake masterpiece. Now, onto the luscious filling. In a large mixing bowl, beat the softened cream cheese with the powdered sugar until smooth and creamy. Add in the vanilla extract and lemon juice, mixing thoroughly. The lemon juice adds just a touch of brightness, balancing out the richness of the cream cheese. Next, gently fold in the whipped heavy cream, being careful not to overmix. This is what makes your cheesecake airy and light while still maintaining that luxurious texture. Spoon the filling onto the chilled crust and spread it evenly. Smooth the top with a spatula and refrigerate for at least 4 hours, or ideally overnight, to allow it to set completely. Before serving, garnish your cheesecake with fresh berries and, if you’re feeling extra indulgent, a drizzle of fruit syrup or a sprinkle of chocolate shavings. Your guests will be amazed by the rich, creamy texture and the refreshing burst of fresh fruit. Feeling ready to create your own royal dessert? Who would you serve this luxurious no-bake cheesecake to? #2024 #cheesecake #royalcheesecake #NoBakeDessertKing #nobake #FitForAKingCheesecake

Classic Ragù vs Rustic Ragù: Two Comforting Sauces, One De...
64 views · Oct 22, 2024 horoscopochino.co
Classic Ragù vs Rustic Ragù: Two Comforting Sauces, One Delicious Choice Whether you're in the mood for the traditional richness of a classic ragù or the rustic simplicity of a rustic ragù, both sauces will make your pasta unforgettable. Let's dive into the key differences between these two, and I’ll show you how to make each one from scratch. The classic ragù is all about depth of flavor, with ingredients that simmer together for hours. It’s a rich sauce that pairs beautifully with wide pasta like tagliatelle or pappardelle. For a traditional ragù classico serving 4-6 people, you'll need: 500g ground beef 200g ground pork 1 onion, finely chopped 2 carrots, finely chopped 2 celery sticks, finely chopped 700g tomato passata 1 glass of red wine 1 cup of beef broth Salt and pepper to taste Olive oil To start, heat some olive oil in a large pan and sauté the onion, carrots, and celery until softened. Add the ground beef and pork, cooking until browned. Pour in the red wine and let it simmer until reduced by half. Then, stir in the tomato passata, beef broth, salt, and pepper. Let everything simmer on low heat for at least two hours, stirring occasionally. The result? A thick, deep-flavored sauce that coats the pasta perfectly. Now, if you're after something a little less fussy, ragù rustico might be your style. It’s a chunkier, heartier version of ragù with more texture and fewer steps. For this rustic recipe, you'll need: 500g beef chunks (or a mix of beef and pork) 1 onion, roughly chopped 2 carrots, chopped into chunks 1 celery stick, sliced 600g diced tomatoes 1 glass of red wine 1 cup of water Salt, pepper, and a pinch of chili flakes Sauté the onion, carrots, and celery in olive oil, then add the beef chunks. Cook until browned, then pour in the red wine and let it reduce. Add the tomatoes, water, and seasonings, then simmer for about an hour and a half. This version doesn’t require as much stirring, but it delivers bold, rustic flavors with a chunkier texture. So, which ragù will you try first? Classic or rustic? Let us know in the comments! #ClassicRaguSauce #RusticItalianFlavors #HomemadeRaguDelight

Broccoli, Mushroom, and Rice: A Delicious One Pot Wonder for...
26 views · Oct 18, 2024 horoscopochino.co
Broccoli, Mushroom, and Rice: A Delicious One-Pot Wonder for Busy Nights Looking for a simple yet incredibly satisfying meal that can be whipped up in under 30 minutes? This broccoli, mushroom, and rice recipe is perfect for those busy weeknights when you need something hearty, healthy, and full of flavor. It's a nutritious dish that’s sure to become a family favorite, packed with wholesome veggies and savory rice. The best part? You only need one pot, meaning less cleanup and more time to relax after dinner! This dish is perfect for anyone who loves the earthy flavors of mushrooms combined with the subtle crunch of broccoli. It's vegetarian-friendly but can be easily customized with some grilled chicken or tofu for extra protein. Whether you're cooking for yourself or feeding a crowd, this recipe is versatile enough to adapt to your needs. To serve four people, you will need the following ingredients: 1 cup of long-grain rice (white or brown) 2 cups of vegetable broth (or chicken broth if preferred) 1 medium head of broccoli, cut into small florets 1 cup of mushrooms, sliced (cremini, button, or shiitake work well) 1 small onion, diced 2 garlic cloves, minced 2 tablespoons of olive oil ½ teaspoon of salt (adjust to taste) ¼ teaspoon of black pepper 1 teaspoon of dried thyme (optional) Grated Parmesan or vegan cheese for garnish (optional) Start by heating the olive oil in a large pan over medium heat. Add the diced onion and cook until softened, about 3 minutes. Toss in the minced garlic and sauté for another minute until fragrant. Now, it's time to add the sliced mushrooms. Let them cook down until they release their moisture and start to brown, around 5 minutes. Once the mushrooms are ready, pour in the rice and stir to coat it in the flavors of the pan. Add the vegetable broth, salt, pepper, and thyme, if using. Bring everything to a simmer, cover, and reduce the heat to low. Cook for 12 minutes, then add the broccoli on top of the rice without stirring it in. Cover again and cook for an additional 8 minutes until the rice is tender and the broccoli is bright green and crisp-tender. Fluff the rice with a fork, mix in the broccoli, and adjust seasoning as needed. Garnish with grated Parmesan or vegan cheese, and you're ready to serve! So, what do you think? Will you try this quick and delicious broccoli mushroom rice for your next dinner? #BroccoliMushroomRice #OnePotMeals #QuickAndEasyDinner #HealthyRecipes #VegetarianFriendly #WeeknightDinners #PlantBasedRecipes #SimpleCooking #WholesomeEats #RiceAndVeggies #MushroomLovers #BroccoliRecipes #DinnerIn30Minutes #EasyMealPrep #flavorfulcooking

Delicious Samoa Rice Krispies: Satisfy Your Sweet Tooth
172 views · Oct 18, 2024 horoscopochino.co
Delicious Samoa Rice Krispies:Satisfy Your Sweet Tooth If you're a fan of the classic Samoa cookie, imagine combining that heavenly taste with the crunch of Rice Krispies. It's the perfect fusion of chewy, crunchy, and gooey goodness. These Samoa Rice Krispies are the ultimate treat that will leave you craving more—and they’re surprisingly easy to make! To make a batch that serves 12 people, you’ll need just a few simple ingredients: 6 cups of Rice Krispies cereal, 10 oz of marshmallows, 3 tbsp of butter, 11 oz of caramel candies, 1 ½ tbsp of milk, 1 cup of shredded sweetened coconut, and 6 oz of chocolate chips. Start by melting the butter in a large pot over medium heat. Add the marshmallows and stir until they’re fully melted and smooth. Once melted, remove the pot from heat and gently fold in the Rice Krispies cereal. Be sure to coat every single puff with that gooey marshmallow mixture! Spread the mixture evenly into a greased 9x13-inch pan and let it cool slightly. While the Rice Krispies are setting, it's time to get that caramel-coconut combo going. In a small saucepan, melt the caramel candies with the milk over low heat. Stir frequently to prevent burning. Once melted, fold in the shredded coconut, creating a sticky, sweet topping that’s reminiscent of your favorite Samoa cookie. Pour this mixture evenly over the Rice Krispies base, pressing it down gently with a spatula. For the final touch, melt the chocolate chips in a microwave-safe bowl, heating them in 30-second intervals and stirring in between until smooth. Drizzle the melted chocolate generously over the top, letting it set for about 30 minutes before cutting into bars. These Samoa Rice Krispies are not only quick and easy to make, but they pack a serious punch of flavor. Whether you’re prepping them for a party or just indulging your own sweet tooth, they’ll be a crowd-pleaser in no time. Plus, they store well in an airtight container for up to a week—though they probably won’t last that long! So, are you ready to give these Samoa Rice Krispies a try? Let us know how yours turn out in the comments below! #EasySamoaDessert #RiceKrispiesSamoa #SweetTreat

Simple keto pumpkin soup recipe: A Delicious Low Carb Deligh...
328 views · Oct 18, 2024 horoscopochino.co
Simple keto pumpkin soup recipe: A Delicious Low-Carb Delight Are you craving something warm, creamy, and comforting but still want to stick to your keto diet? Look no further! This simple keto pumpkin soup recipe is not only packed with flavor but also incredibly easy to make. With just a few basic ingredients, you can whip up a bowl of velvety goodness that satisfies your fall cravings without the guilt. Now, let's talk about the star ingredient—pumpkin! It's rich in fiber, low in carbs, and full of essential vitamins like A and C. The best part? It pairs perfectly with creamy coconut milk and warm spices to create a dish that's indulgent yet healthy. If you're following a low-carb lifestyle, this keto pumpkin soup will quickly become a go-to recipe in your weekly rotation. For this recipe, you’ll need just a handful of simple ingredients, many of which you might already have in your pantry. The result? A luscious, creamy soup that feels like a cozy fall hug, without knocking you out of ketosis. This soup is perfect for those cooler evenings when you want something quick, comforting, and nutritious. Ingredients (Serves 4): 2 cups pumpkin puree (canned or homemade) 2 cups chicken broth (or vegetable broth for a vegetarian option) 1 cup unsweetened coconut milk 1 tablespoon olive oil 1 medium onion, chopped 2 garlic cloves, minced 1 teaspoon ground cinnamon 1 teaspoon ground ginger Salt and pepper to taste Optional: pumpkin seeds, a pinch of nutmeg, or a dollop of sour cream for garnish Start by heating olive oil in a pot over medium heat. Add the chopped onion and garlic, sautéing until fragrant and soft—about 3-4 minutes. Next, stir in the pumpkin puree, cinnamon, and ginger, allowing the flavors to meld together for a minute or so. Now, pour in the chicken broth and coconut milk, stirring well to combine. Let the soup simmer for about 10 minutes to thicken slightly and develop its rich flavor. Season with salt and pepper, then blend the soup for a silky smooth texture (an immersion blender works wonders here). Ladle into bowls and garnish with pumpkin seeds or a pinch of nutmeg for that extra touch. So, what’s stopping you from making this delicious keto pumpkin soup? It’s warm, comforting, and will definitely become a seasonal favorite. Let us know if you tried this recipe, and feel free to share your variations! #EasyKetoMeals #KetoPumpkinSoup #LowCarbComfortFood

Broccoli Soup with a Twist: A Delicious Gluten Free Option
3K views · Oct 8, 2024 horoscopochino.co
Broccoli Soup with a Twist: A Delicious Gluten-Free Option Are you looking for a comforting, healthy, and easy-to-make dish that fits into your gluten-free lifestyle? This creamy gluten-free broccoli soup is here to warm your soul and impress your taste buds. Packed with nutrients and bursting with flavor, this recipe proves that going gluten-free doesn't mean sacrificing taste. Broccoli, known for its high vitamin C content and antioxidant properties, takes center stage in this soup. Not only is it a nutritional powerhouse, but it also provides a vibrant color that looks stunning on any dinner table. By blending the broccoli into a smooth, velvety texture, this dish becomes rich and satisfying without the need for heavy creams or gluten-based thickeners. Let’s talk ingredients. For this recipe, you’ll need: 4 cups of broccoli florets 1 large onion, chopped 2 cloves of garlic, minced 4 cups of vegetable broth (ensure it’s gluten-free) 1 medium potato, peeled and diced 1 cup of unsweetened almond milk (or any plant-based milk) 2 tablespoons of olive oil Salt and pepper to taste A pinch of nutmeg for added warmth (optional) This recipe will serve about 4 people, so it’s perfect for a cozy family dinner or to meal prep for the week. Now, the method is simple but yields a fantastic result. Start by heating the olive oil in a large pot over medium heat. Add the onion and garlic, cooking until they’re fragrant and softened, about 5 minutes. Next, toss in the broccoli florets and diced potato. Stir everything together for a few minutes, allowing the flavors to meld. Pour in the vegetable broth and bring it to a boil. Once boiling, reduce the heat to low and simmer for 15 minutes, or until the potatoes and broccoli are tender. After everything is cooked, carefully blend the mixture until it’s silky smooth. If you don’t have an immersion blender, a regular blender works just as well. Return the soup to the pot, stir in the almond milk, and season with salt, pepper, and nutmeg. Warm it up for another few minutes, and it’s ready to serve. This soup can be topped with a drizzle of olive oil, a sprinkle of fresh herbs, or even gluten-free croutons for added texture. It's light, wholesome, and incredibly versatile. Ready to make your gluten-free broccoli soup even more creative? Try adding a squeeze of lemon juice or a dollop of Greek yogurt for a tangy kick! How do you like to elevate your gluten-free dishes? Share your thoughts below! #GlutenFreeCooking #HealthyBroccoliSoup #EasySoupRecipe

Delicious Apple Caramel Pie with Pecans
619 views · Oct 3, 2024 horoscopochino.co
Delicious Apple Caramel Pie with Pecans Imagine biting into a buttery, flaky crust filled with tender apples, a rich caramel sauce, and crunchy pecans. Sounds like a dream, right? This apple caramel pie with pecans is the dessert that turns any gathering into a celebration. It’s the perfect balance of sweet and salty, with the comforting warmth of apples and the satisfying crunch of pecans in every bite. With just a few steps and common ingredients, you can impress your friends and family with this mouthwatering treat. Here's what you'll need: For the filling: 6 cups of peeled and sliced apples (Granny Smith or Honeycrisp work best) ½ cup granulated sugar ½ cup brown sugar 1 teaspoon ground cinnamon ¼ teaspoon ground nutmeg 2 tablespoons all-purpose flour ¼ teaspoon salt For the caramel sauce: ½ cup caramel sauce (store-bought or homemade) 1 tablespoon unsalted butter For the topping: 1 cup pecans, chopped 2 tablespoons granulated sugar For the crust: 1 pre-made pie crust (or homemade, if you're feeling ambitious) This recipe serves 8-10 people and can easily be doubled if you're feeding a crowd!. Start by preheating your oven to 375°F (190°C). In a large bowl, toss the apples with granulated sugar, brown sugar, cinnamon, nutmeg, flour, and salt until evenly coated. Roll out your pie crust and line it in a 9-inch pie dish, pressing it firmly into the edges. Pour the apple mixture into the crust, and then drizzle the caramel sauce over the top, making sure it seeps into all the crevices of the apples. Add small dots of butter on top to ensure a rich, golden finish. Sprinkle the chopped pecans over the filling, pressing them gently into the apples. Top it all off with a dusting of granulated sugar for an extra crunch. Bake the pie for 45-50 minutes, or until the crust is golden and the filling is bubbling. Let the pie cool for at least 30 minutes before serving, as this will allow the caramel to set and the flavors to meld perfectly. Serve warm with a scoop of vanilla ice cream, and watch it disappear in minutes!. Ready to bake your own apple caramel pie with pecans, or do you have a secret ingredient you like to add? Let us know in the comments below! #AppleCaramelPie #PecanDesserts #FallDessertRecipes

Food Wishes Sweet Potato Casserole: A Delicious Twist on Tra...
136 views · Oct 1, 2024 horoscopochino.co
Food Wishes Sweet Potato Casserole: A Delicious Twist on Tradition If you’ve been searching for the ultimate sweet potato casserole, the kind that’s both comforting and impressive, look no further than this Food Wishes-inspired version. It's creamy, sweet, and topped with a perfectly toasted layer of marshmallows that will win over any crowd. Whether you’re making it for a holiday gathering or just as a treat for yourself, this sweet potato casserole is guaranteed to deliver. It’s the kind of dish that brings smiles to the table—and leaves everyone asking for the recipe. Why should this be your go-to sweet potato casserole? It's all about balance. The sweet potatoes are mashed to creamy perfection with a hint of cinnamon and vanilla, while the marshmallows on top add that classic, gooey touch. But it doesn’t stop there. This version brings a touch of brown sugar and butter, creating a rich, caramelized base that contrasts beautifully with the fluffy marshmallows. For a recipe that serves 6, here’s what you’ll need: 4 large sweet potatoes, peeled and chopped 1/2 cup brown sugar 1/4 cup melted butter 1/4 cup heavy cream 1 teaspoon vanilla extract 1/2 teaspoon cinnamon Salt to taste 2 cups mini marshmallows Start by boiling the sweet potatoes in a large pot of salted water until tender, about 20 minutes. Drain and mash them in a large mixing bowl. Add the brown sugar, melted butter, heavy cream, vanilla extract, cinnamon, and a pinch of salt to the mashed potatoes. Stir until everything is well combined and the mixture is smooth and creamy. Next, preheat your oven to 375°F (190°C). Transfer the sweet potato mixture to a greased 9x13-inch baking dish, spreading it out evenly. Top the sweet potatoes with the mini marshmallows, making sure they cover the surface. Bake the casserole for 15-20 minutes, or until the marshmallows are golden and slightly crispy on top. Let it cool for a few minutes before serving—this dish is best enjoyed warm when the marshmallows are gooey and the sweet potatoes are still creamy. This Food Wishes-inspired sweet potato casserole is the perfect mix of tradition and indulgence. It’s sure to become a favorite at your table. How do you like your sweet potato casserole? Do you stick to the classics, or do you have a twist of your own? Let us know in the comments! #FoodWishesSweetPotatoCasserole #HolidayComfortFood #SweetPotatoDelight

Ground Beef and Cauliflower Casserole: A Delicious Low Carb ...
4K views · Sep 24, 2024 horoscopochino.co
Ground Beef and Cauliflower Casserole: A Delicious Low-Carb Comfort Food Imagine a casserole so hearty, so rich, yet low in carbs that you won't even miss the pasta or potatoes. That's exactly what you get with this ground beef and cauliflower casserole. Packed with flavor and nutrients, it's a comforting dish that feels indulgent but is actually healthy. Whether you're trying to cut down on carbs or just looking for a delicious weeknight meal, this recipe hits all the right notes. The magic of this casserole lies in its simplicity. Ground beef provides that savory, meaty base, while cauliflower gives you all the texture of a starchy veggie without the carbs. Add a creamy, cheesy topping, and you’ve got a dish that satisfies both your hunger and your taste buds. Plus, it’s super easy to customize! Want to throw in some extra veggies like spinach or zucchini? Go ahead. Prefer a spicier kick? Just add some chili flakes. Here’s what you need for a casserole that serves 6: 1 pound of ground beef 1 medium head of cauliflower (about 4 cups, chopped) 1 small onion, diced 2 cloves garlic, minced 1 cup shredded cheddar cheese 1/2 cup sour cream 1/4 cup heavy cream 1 tablespoon olive oil 1 teaspoon paprika Salt and pepper to taste 1/4 cup grated Parmesan cheese for topping First, preheat your oven to 375°F (190°C). Steam or boil the cauliflower until tender, then drain and set aside. In a large skillet, heat the olive oil over medium heat and cook the onion and garlic until soft. Add the ground beef, breaking it up as it cooks. Season with salt, pepper, and paprika. Once the beef is browned and cooked through, mix in the sour cream and heavy cream, letting the sauce simmer for a few minutes. Then, stir in the cauliflower until everything is well combined. Transfer the mixture to a greased 9x13-inch baking dish. Top with the shredded cheddar and a sprinkle of Parmesan. Bake for 20 minutes, or until the cheese is melted and bubbly. Pull it out of the oven, and you’ve got a golden, creamy casserole that's as nutritious as it is comforting. It’s perfect for a family dinner or meal prep for the week. What’s your favorite way to customize this casserole? Let us know how you make it your own! #GroundBeefCauliflowerCasserole #LowCarbComfortFood #HealthyCasserole

Keto Bread Victoria: A Delicious Low Carb Twist on a Classic...
99 views · Sep 10, 2024 horoscopochino.co
Keto Bread Victoria: A Delicious Low-Carb Twist on a Classic Favorite Craving the comforting taste of homemade bread but don’t want to stray from your keto diet? Keto Bread Victoria is the answer to all your low-carb bread dreams! This deliciously fluffy and satisfying loaf offers everything you love about traditional bread—minus the carbs. So, what makes Keto Bread Victoria so special? It’s all about reimagining the classic bread recipe using keto-friendly ingredients that keep the carbs low and the flavor high. This bread uses a mix of almond flour and psyllium husk powder, creating a texture that’s remarkably similar to traditional bread. The almond flour gives it a subtle nuttiness and keeps it light, while the psyllium husk adds the perfect amount of chewiness and helps bind the ingredients together, making the bread feel like a true loaf, not a low-carb imitation. But it’s not just the ingredients that make this bread a standout—it's the method, too. Keto Bread Victoria is quick to make and doesn’t require any yeast or long rising times, which means you can have a fresh, warm loaf ready to enjoy in just about an hour. This is the perfect bread to have on hand for toast in the morning, a sandwich at lunch, or as a side to your favorite keto-friendly soup or salad. It toasts beautifully, holds up to spreads, and even works great for keto breadcrumbs or croutons. Here’s a simple tip to make sure your Keto Bread Victoria turns out perfect every time: Mix your dry ingredients thoroughly before adding the wet ones. This helps evenly distribute the psyllium husk and baking powder, ensuring your bread rises evenly and has a uniform texture. And when mixing in the wet ingredients, be gentle. You want to incorporate everything without overmixing to keep the bread from becoming too dense. Want to make it even more exciting? Try adding some herbs and spices, like rosemary or garlic powder, for a savory twist, or mix in some shredded cheese for a deliciously cheesy bread that’s perfect for keto sandwiches. So, are you ready to transform your keto kitchen with this amazing Keto Bread Victoria recipe? Have you tried making your own low-carb bread, or do you have any creative variations of your own? Share your thoughts and recipes in the comments below! #KetoBreadVictoria #LowCarbBaking #HealthyKetoRecipes

Delicious Keto Sesame Bread: A Low Carb Alternative You’ll...
3K views · Sep 6, 2024 horoscopochino.co
Delicious Keto Sesame Bread: A Low-Carb Alternative You’ll Love Craving a slice of bread that won’t break your keto streak? Say hello to Keto Sesame Bread—a low-carb, high-flavor solution that’s perfect for anyone looking to enjoy the simple pleasures of bread while staying on track with their ketogenic diet. This bread is not just a replacement; it’s a revelation! What’s the secret behind Keto Sesame Bread? It’s all in the ingredients. Instead of using traditional wheat flour, this bread relies on a blend of almond flour and ground sesame seeds. The almond flour keeps the bread light and fluffy, while the sesame seeds add a unique nutty flavor and a delightful crunch. Together, they create a bread that’s not only delicious but also packed with healthy fats and proteins, making it a great option for a keto-friendly meal or snack. But what really sets this bread apart is its versatility. Whether you’re in the mood for a classic sandwich, a savory toast, or even just a simple slice with butter, Keto Sesame Bread is up to the task. It holds up well to toasting, spreads, and fillings, and its subtle sesame flavor pairs beautifully with a wide range of toppings. Plus, it’s gluten-free and sugar-free, so you can indulge without any of the usual bread guilt. With just a few basic ingredients and a bit of time, you can have a fresh, homemade loaf ready to go. The key to success is in the preparation: make sure to mix your dry ingredients thoroughly to avoid clumping, and be gentle when folding in your wet ingredients to maintain that perfect bread texture. A dash of apple cider vinegar adds a bit of lift, making the bread fluffy, while a sprinkling of sesame seeds on top gives it a beautiful, bakery-style finish. Ready to give Keto Sesame Bread a try? Here’s a tip: keep an eye on the baking time. Because this bread is made with nut flours, it can brown faster than traditional bread. Cover it loosely with foil if it starts to get too dark before it’s fully cooked in the center. So, why settle for bland and boring when you can have Keto Sesame Bread that’s full of flavor and texture? It’s time to elevate your keto baking game and enjoy the best of both worlds—great taste and low carbs. Have you ever tried making your own Keto Sesame Bread? Share your experiences in the comments below! #KetoSesameBread #LowCarbRecipes #HealthyKetoBaking

Potato Cheese Steaks: A Delicious Recipe
4K views · Jul 18, 2024 horoscopochino.co
Potato Cheese Steaks: A Delicious Recipe Potato cheese steaks are a delightful and hearty dish that combines the comforting flavors of potatoes and cheese with the savory taste of steak. This recipe is perfect for those who enjoy experimenting in the kitchen and want to create a satisfying meal for their family or friends. This recipe serves four people and is ideal for a cozy dinner or a special occasion. Ingredients: - 4 medium-sized potatoes - 2 tablespoons olive oil - 1 teaspoon salt - 1 teaspoon black pepper - 2 tablespoons butter - 1 large onion, thinly sliced - 1 red bell pepper, thinly sliced - 1 green bell pepper, thinly sliced - 1 pound steak (ribeye or sirloin), thinly sliced - 1 teaspoon garlic powder - 1 teaspoon paprika - 1 cup shredded cheddar cheese - 1 cup shredded mozzarella cheese - 4 hoagie rolls or baguettes - Optional: mayonnaise, mustard, lettuce, and tomatoes for serving Preparation: 1. Preheat your oven to 400°F (200°C). Wash the potatoes thoroughly, then cut them into thin wedges. Place the potato wedges in a bowl and toss with olive oil, salt, and black pepper until evenly coated. Spread the potato wedges on a baking sheet in a single layer and bake for 25-30 minutes or until golden brown and crispy. 2. While the potatoes are baking, heat a large skillet over medium heat and melt the butter. Add the sliced onions and bell peppers to the skillet and cook until they become soft and slightly caramelized, about 10 minutes. Remove the vegetables from the skillet and set aside. 3. In the same skillet, add the thinly sliced steak. Season with garlic powder, paprika, salt, and black pepper. Cook the steak over medium-high heat until it is browned and cooked through, about 5-7 minutes. Make sure to stir occasionally to ensure even cooking. Once the steak is cooked, return the cooked onions and bell peppers to the skillet and mix well. 4. Reduce the heat to low and sprinkle the shredded cheddar and mozzarella cheeses over the steak and vegetable mixture. Cover the skillet with a lid and allow the cheese to melt completely, creating a gooey and delicious topping. 5. While the cheese is melting, prepare the hoagie rolls or baguettes by slicing them open lengthwise. If desired, spread mayonnaise or mustard on the inside of the rolls. You can also add lettuce and tomatoes for extra freshness and flavor. 6. Once the cheese has melted, remove the skillet from the heat. Use a spatula to scoop the cheesy steak and vegetable mixture into the prepared rolls, dividing it evenly among the four sandwiches. Serve the potato cheese steaks hot, accompanied by the crispy potato wedges on the side. This potato cheese steak recipe is sure to become a favorite in your household. The combination of tender steak, melted cheese, and caramelized vegetables nestled in a soft roll, paired with crispy potato wedges, makes for an unforgettable meal. For more delicious recipes and cooking tips, make sure to subscribe to our channel and never miss out on our latest culinary creations. also Watch: Creating a Delicious and Nutritious Cauliflower Gravy Recipe https://youtu.be/HyvwISx4eOY

Creating a Delicious and Nutritious Cauliflower Gravy Recipe
2K views · Jul 8, 2024 horoscopochino.co
Creating a Delicious and Nutritious Cauliflower Gravy Recipe Cauliflower is a versatile and nutritious vegetable that has gained immense popularity in contemporary cuisine. One innovative way to incorporate this vegetable into your meals is by preparing cauliflower gravy. This dish not only serves as a flavorful accompaniment but also provides a healthy alternative to traditional gravies that are often high in calories and fat. Here, we present a detailed cauliflower gravy recipe that is both easy to make and rich in flavor. To begin, gather the necessary ingredients. You will need one large head of cauliflower, two tablespoons of olive oil, one finely chopped onion, two minced garlic cloves, two cups of vegetable broth, half a cup of unsweetened almond milk, a tablespoon of nutritional yeast, and a selection of herbs and spices including salt, pepper, thyme, and rosemary. Start by preparing the cauliflower. Remove the leaves and cut the cauliflower into florets. Rinse the florets thoroughly under cold water and set them aside. In a large pot, heat the olive oil over medium heat. Add the chopped onion and sauté until it becomes translucent, which should take about five minutes. Following this, add the minced garlic and continue to sauté for another minute, ensuring that the garlic does not burn. Next, add the cauliflower florets to the pot and stir well to combine with the onion and garlic. Pour in the vegetable broth, ensuring that the cauliflower is mostly submerged. Increase the heat to bring the mixture to a boil, then reduce to a simmer. Cover the pot and let it cook for about 15 minutes, or until the cauliflower is tender when pierced with a fork. Once the cauliflower is cooked, remove the pot from heat. Using an immersion blender, blend the mixture until it reaches a smooth and creamy consistency. If you do not have an immersion blender, a regular blender can be used; just be sure to blend in batches to avoid overfilling. After blending, return the pot to the stove over low heat. Stir in the unsweetened almond milk and nutritional yeast. The almond milk adds a creamy texture without the need for dairy, while the nutritional yeast imparts a slightly cheesy flavor that enhances the overall taste of the gravy. Season the gravy with salt, pepper, thyme, and rosemary to taste. Allow the gravy to simmer for an additional five minutes, stirring occasionally to prevent it from sticking to the bottom of the pot. Cauliflower gravy is now ready to be served. This versatile dish pairs well with a variety of foods, including mashed potatoes, roasted vegetables, and plant-based proteins like lentil loaves or tempeh. It can also be used as a topping for biscuits or as a sauce for pasta, making it a valuable addition to your culinary repertoire. In conclusion, cauliflower gravy is a delightful and healthful alternative to traditional gravy. Its creamy texture and rich flavor make it a perfect accompaniment to numerous dishes. This recipe not only highlights the versatility of cauliflower but also promotes a nutritious and balanced diet. For those interested in exploring more creative and healthy recipes, there are plenty of resources and video tutorials available online. #2024 #delicious #deliciousfood #deliciousrecipe #deliciousrecipes #nutritious #nutritiousfood #cauliflower #cauliflowerrecipe #gravy #recipe #recipes

Low Carb Slow Cooker Pot Roast: A Delicious Recipe
150 views · May 23, 2024 horoscopochino.co
Low Carb Slow Cooker Pot Roast: A Delicious Recipe Pot roast is a comforting and hearty meal that can be adapted to fit various dietary needs. For those following a low carb diet, a slow cooker pot roast is an excellent option. This method not only enhances the flavors of the meat and vegetables but also makes the cooking process incredibly convenient. This recipe serves six people and ensures a flavorful, satisfying meal without the excess carbohydrates. Ingredients: - 3 pounds chuck roast - 1 tablespoon olive oil - 1 teaspoon salt - 1/2 teaspoon black pepper - 1 teaspoon garlic powder - 1 teaspoon onion powder - 1 teaspoon dried thyme - 1 teaspoon dried rosemary - 1 cup beef broth - 1/2 cup dry red wine (optional) - 1 large onion, sliced - 3 cloves garlic, minced - 3 cups cauliflower florets - 2 cups baby carrots - 2 cups celery, chopped - 2 tablespoons tomato paste - 2 bay leaves - Fresh parsley, chopped (for garnish) Instructions: 1. Begin by seasoning the chuck roast with salt, black pepper, garlic powder, onion powder, dried thyme, and dried rosemary. Ensure the meat is well-coated with the spices for maximum flavor. 2. Heat the olive oil in a large skillet over medium-high heat. Sear the seasoned roast on all sides until it is browned. This step locks in the flavors and creates a beautiful crust on the meat. 3. Transfer the seared roast to the slow cooker. In the same skillet, add the onion slices and minced garlic, sautéing until they are fragrant and slightly caramelized. This process deglaze the skillet, incorporating the flavorful browned bits into the onions and garlic. 4. Add the sautéed onions and garlic to the slow cooker, spreading them evenly over the roast. Pour in the beef broth and dry red wine, ensuring the liquid covers the bottom of the slow cooker. 5. Spread the tomato paste over the top of the roast. This adds a rich depth of flavor and helps to thicken the cooking juices into a delectable gravy. 6. Add the cauliflower florets, baby carrots, and chopped celery around the roast. These vegetables provide a low-carb alternative to traditional potatoes, maintaining the hearty essence of a classic pot roast. 7. Place the bay leaves in the slow cooker. These aromatic leaves infuse the dish with a subtle, earthy flavor that compliments the other spices. 8. Cover the slow cooker and set it to low. Allow the pot roast to cook for 8 to 10 hours, or until the meat is tender and easily shreds with a fork. The low and slow cooking method ensures that the meat remains juicy and the flavors meld beautifully. 9. Once cooked, remove the bay leaves and discard them. Carefully transfer the roast to a serving platter and arrange the vegetables around it. 10. Garnish with freshly chopped parsley for a burst of color and freshness. Serve the pot roast with the vegetables and a spoonful of the delicious gravy from the slow cooker. This low carb slow cooker pot roast is perfect for a family dinner or a meal prep option for the week. The slow cooking method not only simplifies the preparation but also results in a tender, flavorful dish that is both satisfying and nutritious. The cauliflower, carrots, and celery provide a wonderful array of textures and flavors while keeping the carbohydrate count low. For more delicious and healthy recipes like this one, subscribe to our channel and never miss out on our expert cooking tips and meal ideas. #2024 #lowcarbdiet #lowcarb #lowcarbrecipes #slow #cooker #potroast #deliciousrecipe #delicious

Low Carb Zucchini Pizza: A Delicious Alternative
457 views · May 23, 2024 horoscopochino.co
Low Carb Zucchini Pizza: A Delicious Alternative In recent years, low carb diets have gained immense popularity among health enthusiasts. One of the innovative and delicious ways to adhere to such a diet is by incorporating zucchini pizza into your meal plan. This recipe not only offers a healthy alternative to traditional pizza but also ensures that you do not miss out on the flavors and satisfaction that a good pizza provides. Ingredients and Servings For this zucchini pizza, the ingredients listed are sufficient to serve four people. Here is what you will need: - 4 medium-sized zucchinis (approximately 8-10 inches each) - 1 cup shredded mozzarella cheese - 1/2 cup grated Parmesan cheese - 1/2 cup marinara sauce (preferably low sugar) - 1/2 cup chopped bell peppers - 1/2 cup sliced mushrooms - 1/4 cup chopped red onions - 1/4 cup sliced black olives - 1/4 teaspoon garlic powder - 1/4 teaspoon dried oregano - 1/4 teaspoon dried basil - Salt and pepper to taste - 1 tablespoon olive oil Preparation Method 1. Preparing the Zucchini Base Begin by preheating your oven to 375°F (190°C). Wash the zucchinis thoroughly and slice them lengthwise into thin slices, approximately 1/4 inch thick. These slices will serve as the base for your pizza. Lay the zucchini slices on a baking sheet lined with parchment paper. Lightly brush each slice with olive oil and sprinkle a pinch of salt and pepper. This step helps to season the base and ensures a slight crispiness when baked. Bake the zucchini slices for about 10 minutes, until they are tender but not fully cooked. 2. Assembling the Pizza Once the zucchini slices are partially baked, remove them from the oven and allow them to cool slightly. Spread a thin layer of marinara sauce over each slice. Be mindful not to use too much sauce to prevent the zucchini from becoming soggy. Next, evenly distribute the shredded mozzarella cheese over the sauced zucchini slices. Add the chopped bell peppers, sliced mushrooms, chopped red onions, and sliced black olives as toppings. Sprinkle the grated Parmesan cheese on top, followed by a light dusting of garlic powder, dried oregano, and dried basil. 3. Final Baking Place the assembled zucchini pizzas back into the oven and bake for an additional 10-12 minutes, or until the cheese is melted and bubbly, and the edges of the zucchini are lightly browned. If you prefer a slightly crispier texture, you can switch to the broil setting for the last 2-3 minutes, but keep a close eye to avoid burning. Nutritional Benefits Zucchini is a nutrient-dense vegetable that provides a significant amount of vitamins and minerals while being low in carbohydrates. It is high in antioxidants, particularly vitamin C and beta-carotene, which contribute to overall health and immune function. Additionally, zucchini is rich in water and fiber, promoting digestive health and aiding in weight management. Using zucchini as a base for pizza significantly reduces the carbohydrate content compared to traditional pizza crust made from wheat flour. This makes it an excellent choice for those following a low-carb or ketogenic diet. Furthermore, the combination of vegetables and cheese ensures a balanced meal that provides protein, healthy fats, and essential nutrients. Conclusion Low carb zucchini pizza is a delightful and nutritious alternative to traditional pizza, offering all the flavors you love without the excess carbohydrates. This recipe is easy to prepare, customizable with your favorite toppings, and perfect for a family meal or a healthy snack. For more tips and recipes like this, be sure to subscribe to our channel. You'll find a wealth of information to support your healthy eating journey and discover more delicious, low carb alternatives. #2024 #lowcarb #lowcarbdiet #lowcarbrecipes #zucchini #zucchinirecipe #zucchininoodles #zucchinibread #pizza #pizzarecipe #delicious #deliciousrecipe

Almond Flour Delights: Discover Delicious Gluten Free-Video
536 views · Apr 9, 2024 horoscopochino.co
Almond Flour Delights: Discover Delicious Gluten Free-Video. Are you ready to explore the incredible possibilities of almond flour? This finely ground nut flour is a fantastic alternative to traditional wheat flour, perfect for gluten-free baking and those watching their carb intake. Its subtle sweetness and tender texture make it a star ingredient for a wide range of delicious treats!

Carrot Cake Bites: Easy, Healthy, & Delicious video
4K views · Apr 5, 2024 horoscopochino.co
Carrot Cake Bites: Easy, Healthy, & Delicious video. These delectable carrot cake bites are the perfect answer! Combining the classic flavors of warm spices, sweet carrots, and a touch of creamy frosting, these bites offer a delightful treat that's perfect for satisfying your sweet cravings. Ingredients: Dry Ingredients:

Apple to the Rescue! Delicious 3 Ingredient Desserts-video
6K views · Apr 2, 2024 horoscopochino.co
Apple to the Rescue! Delicious 3 Ingredient Desserts-video. Are you ready to ditch the flour and sugar and embrace the sweet, wholesome goodness of apples? I'm bursting with excitement to share a magical recipe that uses the humble apple to create incredible desserts – all with just 3 simple ingredients!

3 Delicious keto Sauces : video blog
3K views · Jan 30, 2024 horoscopochino.co
3 Delicious keto Sauces : video blog. We're whipping up 3 mouthwatering, keto-friendly sauces that'll transform your meals from blah to BAM. Ready to unleash your inner culinary whiz? Let's go! 1. Creamy Chipotle Ranch (2-3 servings):
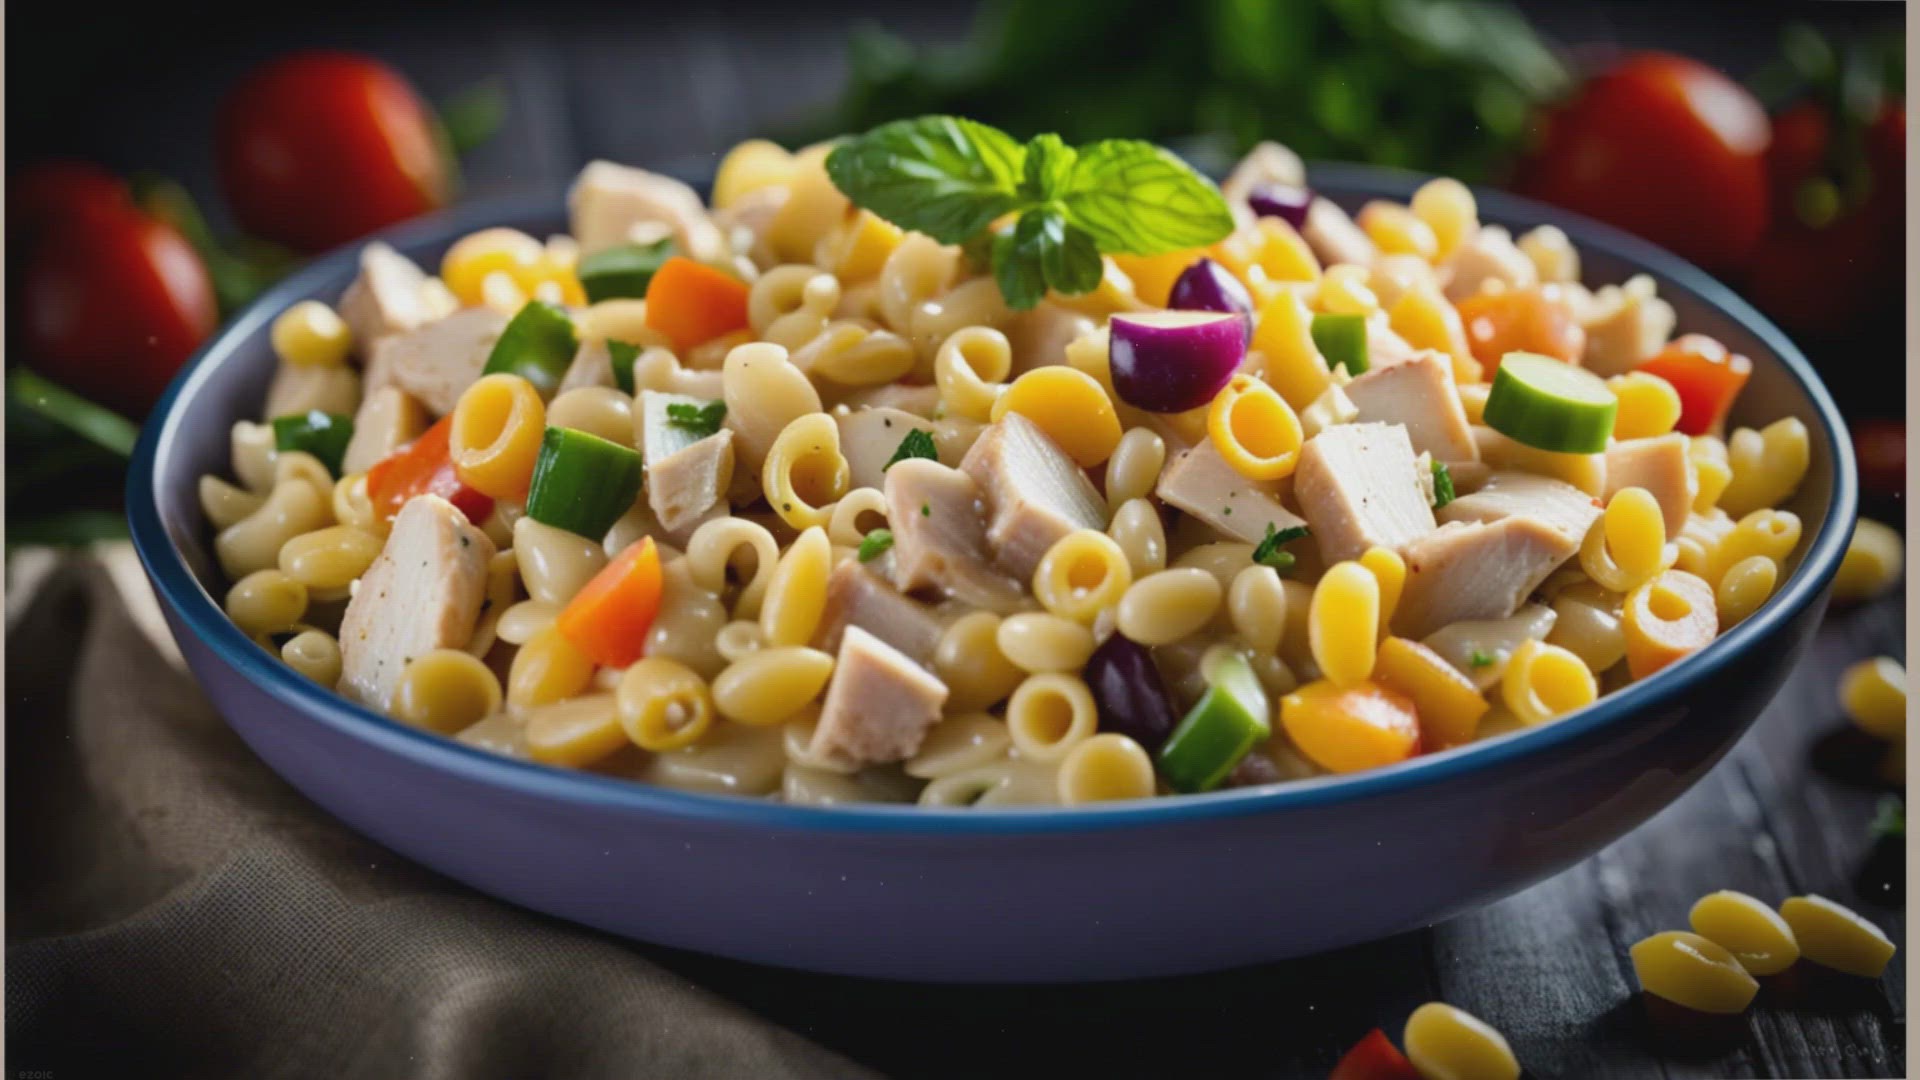
Delicious Chicken Macaroni Salad Recipe: A Perfect Blend of ...
21K views · Dec 24, 2023 horoscopochino.co
Looking for a delightful salad recipe? This chicken macaroni salad is a crowd-pleaser. Packed with juicy chicken, al dente macaroni, and a medley of veggies, it's a wholesome meal on its own. In this video, we'll guide you through the step-by-step process of making this delectable dish. Let's get started!

Delicious Mango Graham: An Easy Recipe for Everyone
3K views · Dec 24, 2023 horoscopochino.co
Learn how to make a delectable mango graham dessert with this simple recipe. Perfect for any occasion, this sweet treat will surely satisfy your cravings. Watch now and discover the steps to create this delightful dish.
Delicious Keto Avocado Pudding Recipe- video blog
15K views · Dec 17, 2023 horoscopochino.co
Delicious Keto Avocado Pudding Recipe- video blog. Ingredients: 1. 2 ripe avocados 2. 1/4 cup unsweetened cocoa powder 3. 1/2 cup coconut milk or almond milk 4. 2-3 tablespoons of erythritol or any keto-friendly sweetener 5. 1 teaspoon vanilla extract

Delicious Stuffed Crab Recipe - video blog
9K views · Dec 17, 2023 horoscopochino.co
Delicious Stuffed Crab Recipe - video blog. Its versatility allows it to be the star ingredient in a variety of dishes, including the delectable stuffed crab. This recipe is not only a testament to the crab’s culinary flexibility but also an invitation to explore the joys of seafood cooking at home.

Delicious Keto Mince Pies Recipe - video blog
11K views · Dec 15, 2023 horoscopochino.co
Delicious Keto Mince Pies Recipe - video blog. This recipe ensures that even those following a low-carb lifestyle can enjoy the festive flavors of mince pies without compromising their dietary needs. The key to keto baking is finding suitable substitutes for high-carb ingredients.

Delicious Vegan Keto Cheesecake: video blog
12K views · Dec 15, 2023 horoscopochino.co
Delicious Vegan Keto Cheesecake: video blog. This guide will walk you through creating a dessert that's both indulgent and in line with your dietary preferences and health goals. Understanding the Vegan Keto Diet Before diving into the recipe, it's essential to understand the vegan keto diet.

Delicious Keto Apple Pie Recipe: video blog
27K views · Dec 13, 2023 horoscopochino.co
Delicious Keto Apple Pie Recipe: video blog. For those following a ketogenic diet, the quest for a low-carb, sugar-free dessert that still tastes indulgent is never-ending. Enter the Keto Apple Pie – a delightful twist on a classic dessert, reimagined to suit a low-carb lifestyle without compromising on taste.

Delicious Keto Smoothie Bowls: video blog
9K views · Dec 13, 2023 horoscopochino.co
Delicious Keto Smoothie Bowls: video blog. Among the various recipes that cater to this dietary preference, keto smoothie bowls stand out for their versatility, nutritional value, and simplicity. In this article, we’ll explore how to create delicious keto smoothie bowls, a perfect option for a nutritious breakfast or a refreshing snack.
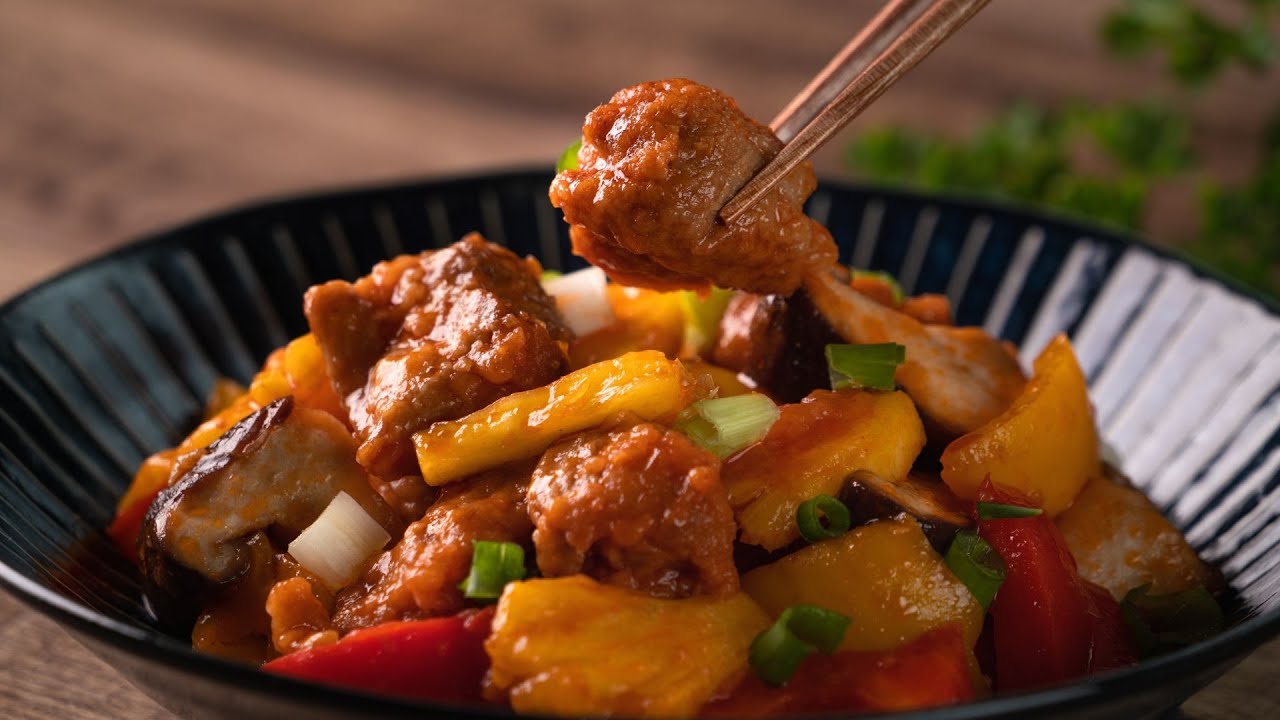
Delicious Low Carb Pork Tocino Recipe: video blog
9K views · Dec 10, 2023 horoscopochino.co
Delicious Low Carb Pork Tocino Recipe: video blog. However, for those adhering to a low-carb diet, the conventional recipe, which typically includes sugar, might not be suitable. This revised version of pork tocino retains the dish's essential flavors while making it friendly for a low-carb lifestyle.

Delicious Gluten Free Almond Cookies Recipe- Easy, Healthy B...
7K views · Dec 10, 2023 horoscopochino.co
Delicious Gluten-Free Almond Cookies Recipe: Easy, Healthy Baking for All Almond cookies have long been a delightful treat savored by many, but those with gluten sensitivities or celiac disease often find themselves unable to enjoy these sweet delicacies. However, the evolution of gluten-free baking has opened up a world of possibilities, allowing everyone to indulge in these delicious treats. This recipe for gluten-free almond cookies not only caters to those with gluten intolerance but also offers a healthier alternative to traditional cookie recipes. Ingredients: 1. Almond Flour: The star of this recipe is almond flour, which is both gluten-free and rich in nutrients. It provides a nutty flavor and a tender crumb, making it an excellent substitute for wheat flour. 2. Baking Powder: To ensure our cookies rise beautifully, we use gluten-free baking powder. 3. Salt: Just a pinch to balance the sweetness. 4. Unsalted Butter: This adds richness and helps in creating a soft texture. For a dairy-free option, coconut oil or vegan butter can be used. 5. Granulated Sugar: To sweeten the cookies. For a healthier twist, coconut sugar or a sugar substitute can be used. 6. Egg: This acts as a binder. For a vegan alternative, a flax egg can be used. 7. Vanilla Extract: For that classic cookie flavor. 8. Almond Extract: This enhances the almond flavor, making the cookies more aromatic. 9. Sliced Almonds: For topping, adding a delightful crunch. Instructions: 1. Preheat and Prepare: Begin by preheating your oven to 350°F (175°C). Line a baking sheet with parchment paper for easy cleanup. 2. Mix Dry Ingredients: In a medium bowl, whisk together almond flour, baking powder, and salt. Ensuring these ingredients are well mixed will result in a consistent cookie texture. 3. Cream Butter and Sugar: In a larger bowl, cream together the butter and sugar until light and fluffy. This process aerates the mixture, contributing to a lighter cookie texture. 4. Add Wet Ingredients: Beat in the egg, vanilla extract, and almond extract until well combined. The mixture should be smooth and homogenous. 5. Combine Wet and Dry Mixtures: Gradually add the dry ingredients to the wet mixture, mixing until just combined. Avoid overmixing to keep the cookies tender. 6. Shape Cookies: Scoop tablespoon-sized balls of dough and place them on the prepared baking sheet. Flatten each ball slightly with your fingers or the back of a spoon. 7. Add Toppings: Press a few sliced almonds onto the top of each cookie for a decorative and crunchy finish. 8. Bake: Bake the cookies for 10-12 minutes, or until they are lightly golden around the edges. They will continue to firm up as they cool. 9. Cooling: Allow the cookies to cool on the baking sheet for about 5 minutes before transferring them to a wire rack to cool completely. Nutritional Benefits and Variations: Almond flour is not only gluten-free but also lower in carbs and higher in protein and fiber compared to traditional wheat flour. This makes these cookies a more nutritious option. For those looking to reduce sugar intake, natural sweeteners like stevia or erythritol can be substituted. Serving and Storage: Serve these cookies with a cup of tea or coffee for a delightful snack. They can be stored in an airtight container for up to a week, making them a convenient treat for any time.
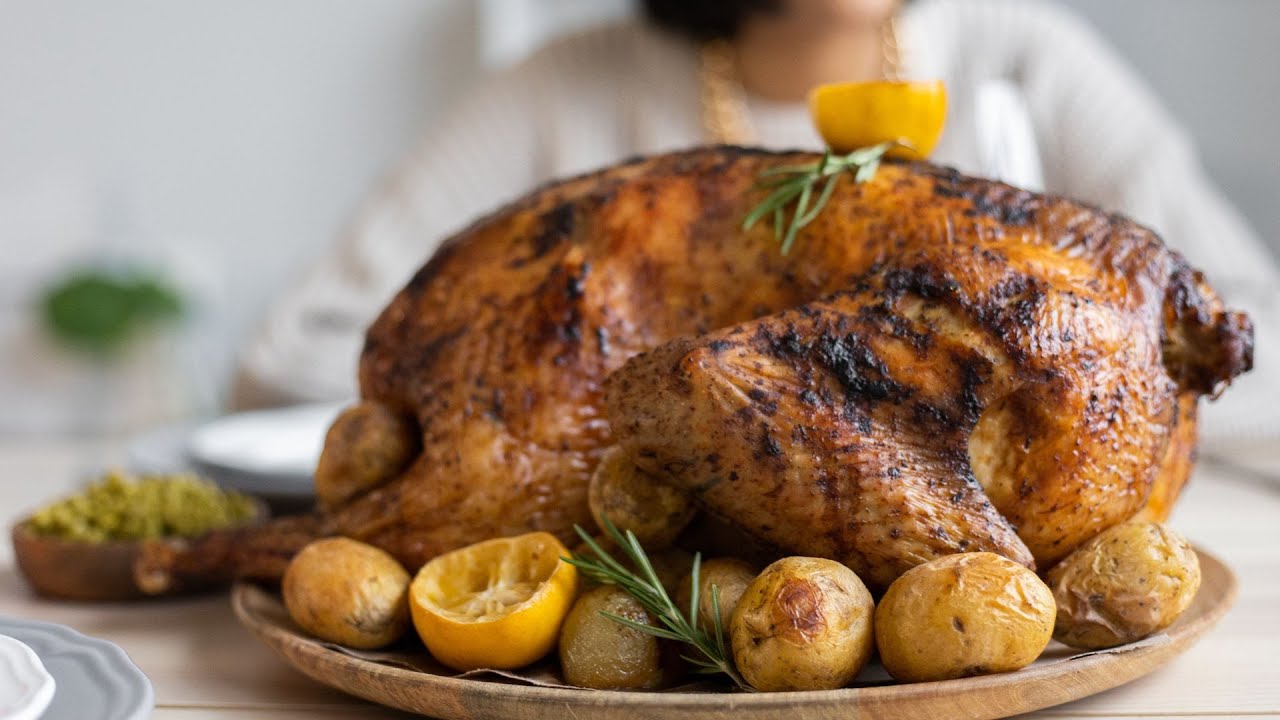
Delicious Keto Turkey Recipe - video blog
5K views · Dec 5, 2023 horoscopochino.co
Delicious Keto Turkey Recipe - video blog. One of the biggest challenges for individuals on this diet is finding flavorful and satisfying recipes that align with its low-carb, high-fat principles. Why Turkey for Keto? Firstly, it's a lean protein source that's low in carbohydrates.

Simple and Delicious Cream Cheese Pound Cake: Heavenly Delig...
28K views · Dec 4, 2023 horoscopochino.co
Simple and Delicious Cream Cheese Pound Cake: Heavenly Delight If you're a fan of classic desserts that never go out of style, then you're in for a treat with this Cream Cheese Pound Cake. This delightful creation is a testament to the fact that sometimes, the simplest recipes yield the most heavenly results. With its rich, buttery flavor and velvety texture, this pound cake is sure to become a family favorite in no time. The beauty of this Cream Cheese Pound Cake lies in its simplicity. You won't need a laundry list of exotic ingredients or intricate techniques to make this cake shine. With just a handful of pantry staples, you can whip up a dessert that will leave everyone asking for seconds. Ingredients: - 1 cup (2 sticks) unsalted butter, softened - 8 oz cream cheese, softened - 3 cups granulated sugar - 6 large eggs - 1 teaspoon vanilla extract - 3 cups all-purpose flour - 1/2 teaspoon salt Instructions: 1. Preheat your oven to 325°F (163°C) and grease and flour a 10-inch tube or bundt pan. This step ensures your cake doesn't stick to the pan. 2. In a large mixing bowl, cream together the softened butter and cream cheese until smooth and creamy. This will take about 2-3 minutes, so be patient. 3. Gradually add the granulated sugar and continue to beat until the mixture is light and fluffy. 4. Add the eggs one at a time, mixing well after each addition. Don't forget to scrape down the sides of the bowl to ensure everything is well incorporated. 5. Stir in the vanilla extract for that classic pound cake aroma. 6. In a separate bowl, whisk together the all-purpose flour and salt. 7. Gradually add the dry ingredients to the wet ingredients, mixing until just combined. Be careful not to overmix at this stage; you want a tender cake. 8. Pour the cake batter into your prepared pan, smoothing the top with a spatula. 9. Bake in the preheated oven for 70-80 minutes or until a toothpick inserted into the center comes out clean. The top should be golden brown, and the cake should spring back when lightly touched. 10. Allow the cake to cool in the pan for about 15 minutes, then remove it from the pan and transfer it to a wire rack to cool completely. Once your Cream Cheese Pound Cake has cooled, you can dust it with powdered sugar, drizzle it with a simple glaze, or serve it with a dollop of freshly whipped cream and berries for an extra touch of elegance. The result? A slice of heaven on your plate! The Cream Cheese Pound Cake is wonderfully moist, thanks to the cream cheese, and has a rich, buttery flavor that lingers on your palate. Its dense crumb and melt-in-your-mouth texture make it an irresistible treat for any occasion. Whether you're serving it as a dessert after a special dinner, bringing it to a potluck, or enjoying it with a cup of tea or coffee on a quiet afternoon, this Cream Cheese Pound Cake is a true crowd-pleaser. It's a timeless classic that proves that sometimes, the simplest recipes are the most delightful. So, gather your ingredients, preheat that oven, and get ready to savor the heavenly delight that is Cream Cheese Pound Cake. Your taste buds will thank you! #cheesecake #poundcake

Delicious Deviled Eggs: video blog
18K views · Dec 2, 2023 horoscopochino.co
Delicious Deviled Eggs: video blog. In this video, we will explore the classic deviled egg recipe, provide some tips for perfecting it, and share some exciting variations that will elevate your deviled eggs to a whole new level. The Classic Deviled Egg Recipe
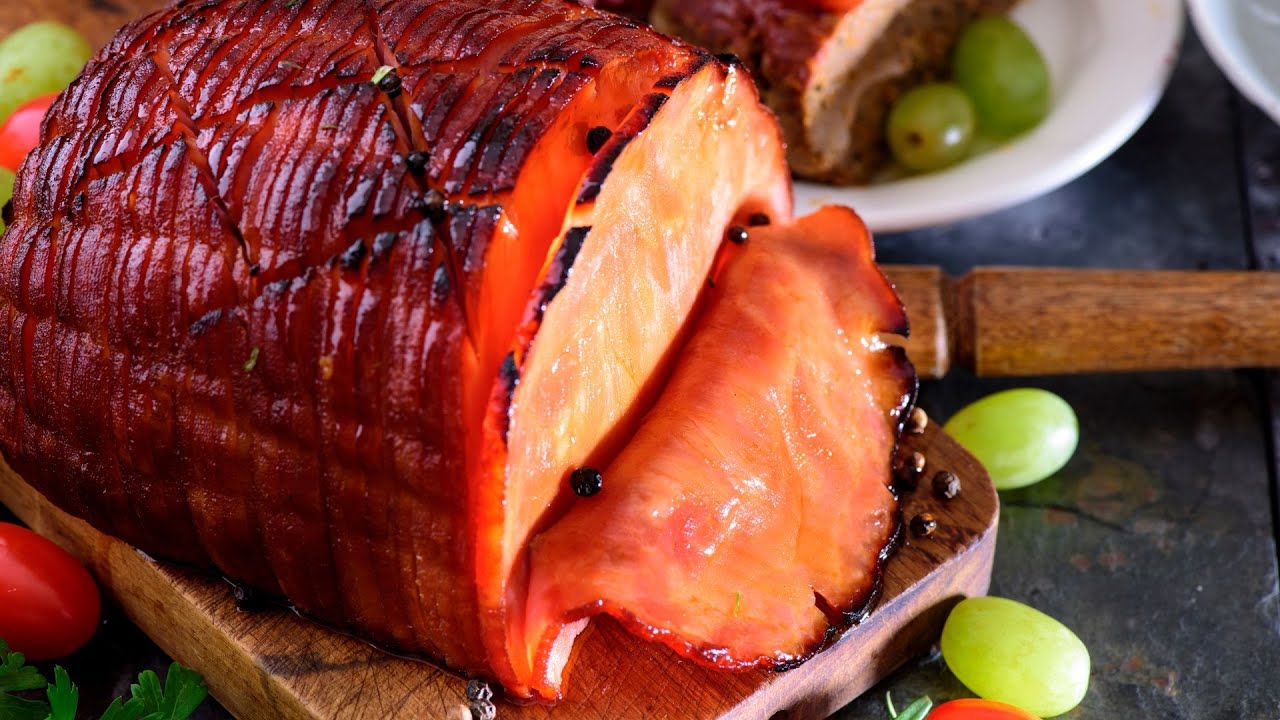
Delicious Ham Glaze Recipe: video blog
9K views · Dec 2, 2023 horoscopochino.co
Delicious Ham Glaze Recipe: video blog. A well-crafted ham glaze can elevate the flavors of your ham to a whole new level, leaving your guests craving for more. The Perfect Ham Glaze Recipe: Ingredients:

Baking Cookies with Oil: A Delicious Alternative to Butter
5K views · Nov 27, 2023 horoscopochino.co
Discover the secret to making mouthwatering cookies without using butter. In this video, we explore the benefits of using oil as a substitute and share a simple recipe that guarantees soft and chewy treats every time.

Chinese New Year food: symbolism and delicious dishes: video...
36K views · Nov 15, 2023 horoscopochino.co
Chinese New Year food: symbolism and delicious dishes: video blog Symbolism in Chinese New Year food: 1. 1. Dumplings (Jiaozi): Dumplings are a staple dish in Chinese New Year celebrations. Their crescent shape is reminiscent of ancient Chinese currency, a symbol of wealth and prosperity. It is believed that making and eating dumplings during the holiday brings financial success and good luck.