Easy and Delicious Pasta Tomato Recipe for a Perfect Italian...
1 views · Nov 3, 2024 horoscopochino.co
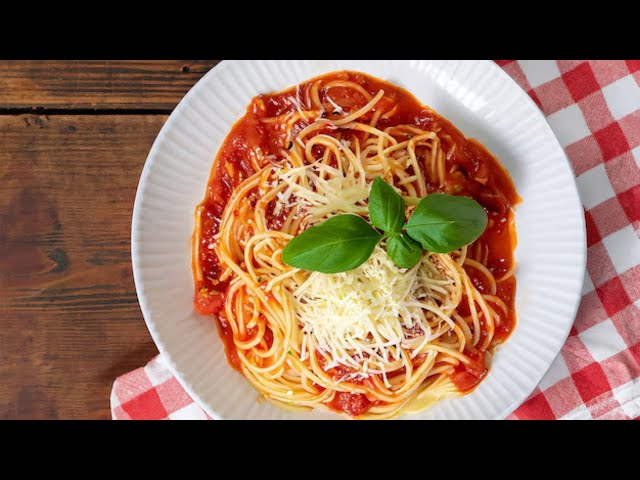
Easy and Delicious Pasta Tomato Recipe for a Perfect Italian Meal This pasta tomato recipe is exactly what you need to satisfy that craving! It’s quick, flavorful, and so satisfying that it’ll become a staple in your kitchen. Plus, with fresh tomatoes and fragrant basil, it’s like a mini Italian escape right at home. This recipe serves four people and only requires a few key ingredients: 400g of pasta (spaghetti, penne, or your favorite) 500g ripe tomatoes (or 1 can of crushed tomatoes if you’re in a rush) 1 small onion, finely chopped 3 cloves of garlic, minced 3 tbsp olive oil Salt and black pepper to taste 1 tsp sugar (to balance the acidity) 1 tsp dried oregano A handful of fresh basil leaves (or 1 tsp dried basil) Freshly grated Parmesan cheese for serving Start by cooking the pasta in a large pot of salted boiling water until al dente, which usually takes about 8-10 minutes. Once the pasta is cooked, drain it and set it aside, saving a small cup of the pasta water to use later in the sauce if needed. While the pasta cooks, it’s time to make that rich tomato sauce. Begin by heating the olive oil in a large skillet over medium heat. Add the chopped onion and cook until it turns soft and translucent, about 4 minutes. This gives the sauce a sweet and rich base. Next, add the minced garlic and cook for just a minute, being careful not to brown it (garlic burns quickly and can turn bitter). Now, add the chopped fresh tomatoes (or canned if you’re short on time). Stir well, and add salt, black pepper, sugar, oregano, and basil. Let the sauce simmer for about 15-20 minutes, stirring occasionally. As it cooks, the tomatoes will break down, and the sauce will thicken and develop an amazing aroma that fills the kitchen. If you find the sauce too thick, add a bit of the reserved pasta water until it reaches your preferred consistency. Once the sauce is ready, toss in the cooked pasta and mix until every piece is coated with that delicious tomato goodness. The sauce will cling perfectly, giving each bite that homemade Italian flavor. Serve hot with a generous sprinkle of Parmesan and a few fresh basil leaves for garnish. This dish is a beautiful balance of simplicity and flavor—a real crowd-pleaser! Do you have a secret ingredient you like to add to your pasta tomato sauce? Share it below and inspire others to try something new! #PastaTomatoRecipe #ItalianPastaMagic #EasyTomatoPasta

Easy Tomato Spaghetti Recipe: A Quick and Delicious Dinner I...
154 views · Oct 24, 2024 horoscopochino.co
Easy Tomato Spaghetti Recipe: A Quick and Delicious Dinner Idea for Tonight Need a quick, tasty, and satisfying meal that doesn’t take hours to prepare? Look no further than this easy tomato spaghetti recipe! In just 20 minutes, you can have a delicious dinner on the table that everyone will love. It’s perfect for those busy weeknights when time is tight, but you still crave something comforting and homemade. The beauty of this recipe is in its simplicity. With a few basic ingredients that you probably already have in your pantry, you’ll be able to whip up a restaurant-quality dish in no time. Plus, it’s light, fresh, and packed with flavor. The magic lies in the combination of juicy tomatoes, fragrant garlic, and a touch of olive oil. Let’s get started! For this recipe, which serves four people, you'll need the following ingredients: 400 grams (14 oz) of spaghetti 3 tablespoons of olive oil 4 garlic cloves, minced 400 grams (14 oz) of canned diced tomatoes (or fresh tomatoes if you prefer) 1 teaspoon of dried oregano A pinch of red pepper flakes (optional for a little heat) Salt and pepper to taste Fresh basil leaves for garnish Grated Parmesan cheese (optional) Start by cooking the spaghetti in salted boiling water according to the package instructions, usually about 8-10 minutes, until al dente. While the pasta is cooking, heat the olive oil in a large skillet over medium heat. Add the minced garlic and sauté for about 1-2 minutes until fragrant, but be careful not to burn it. Next, stir in the diced tomatoes, oregano, red pepper flakes, and season with salt and pepper. Let it simmer for about 5-7 minutes, stirring occasionally, until the sauce thickens slightly. You can add a splash of pasta water to the sauce to give it a more velvety texture. Once the spaghetti is ready, drain it and toss it into the skillet with the tomato sauce. Mix everything well so that the pasta is evenly coated with the sauce. Garnish with fresh basil and serve with a generous sprinkle of grated Parmesan. This quick and easy meal is not only budget-friendly but also incredibly versatile. You can add your favorite vegetables or proteins like grilled chicken or shrimp to make it heartier. So, what’s stopping you from giving this a try tonight? Let us know how it turned out in the comments below! What’s your favorite twist on a classic spaghetti dish? #2024 #tomatospaghetti #QuickPastaFix #TomatoSpaghettiDelight #EasyWeeknightPasta #pastarecipe #easyrecipe

5 Minute Carbonara Recipe - Easy Pasta Cooking Hack You Need...
7 views · Oct 24, 2024 horoscopochino.co
5 Minute Carbonara Recipe - Easy Pasta Cooking Hack You Need Tonight Craving something delicious but short on time? This 5-minute carbonara recipe will be your new best friend in the kitchen! With just a handful of ingredients, you can whip up a classic Italian dish that’s creamy, savory, and loaded with flavor. Forget about spending hours in the kitchen—this quick and easy carbonara hack will give you restaurant-quality pasta in no time. The secret to a perfect carbonara is its simplicity. No need for cream here—just a rich egg mixture, some salty pancetta (or bacon), and freshly grated Parmesan cheese. In this version, we’ll have you ready to eat in five minutes flat. It’s ideal for those busy weeknights when you want something comforting but don’t have the luxury of time. This recipe serves two people, but you can easily double it if needed. Here’s what you’ll need: 200 grams (7 oz) of spaghetti or any pasta you prefer 100 grams (3.5 oz) of pancetta or bacon, diced 2 large eggs 1/2 cup (50 grams) of grated Parmesan cheese 1 garlic clove, minced (optional) Salt and freshly ground black pepper to taste A handful of fresh parsley (optional, for garnish) First, start by cooking the pasta in a pot of boiling salted water. While the pasta is cooking, heat a small skillet over medium heat and add the diced pancetta or bacon. Cook for about 3-4 minutes until crispy. If you love garlic, throw in the minced garlic during the last minute of cooking for extra flavor. In a bowl, whisk together the eggs and grated Parmesan until smooth. Add a good pinch of black pepper to the mixture—this is where a lot of that authentic flavor comes from. As soon as the pasta is done, reserve a little bit of the pasta water and drain the rest. Quickly toss the hot pasta into the pan with the pancetta, remove from heat, and immediately pour the egg mixture over the pasta. Toss everything together vigorously, adding a little reserved pasta water if the sauce feels too thick. The heat from the pasta will cook the eggs, creating that creamy carbonara sauce everyone loves. Serve immediately, topped with a sprinkle of fresh parsley if you like. How easy was that? Let us know in the comments if you tried this quick carbonara hack! What’s your favorite pasta dish to make when you’re in a hurry? #2024 #carbonararecipe #carbonara #carbonarapasta #5minutecarbonara #quickpastarecipe #easycarbonararecipe

The Best Oven-Style Jamaican Jerk Pork: Bold Flavors, Easy t...
74 views · Oct 18, 2024 horoscopochino.co
The Best Oven-Style Jamaican Jerk Pork: Bold Flavors, Easy to Make Craving that authentic Jamaican jerk pork but don’t have a grill or the time to slow cook it over a fire? No worries! This oven-style jerk pork recipe will bring all the bold, smoky, spicy flavors of traditional jerk pork right into your kitchen—without the need for a grill. With just a few key ingredients and a bit of time, you’ll have an incredibly delicious and tender pork dish that tastes like it’s straight from the Caribbean. For this recipe, which serves about 4-6 people, you’ll need the following ingredients: 1.5 kg (about 3 lbs) of pork shoulder or pork butt, cut into large chunks 2 tablespoons of jerk seasoning (store-bought or homemade) 2 garlic cloves, minced 1 tablespoon of fresh ginger, grated 1 tablespoon of soy sauce 1 tablespoon of olive oil 2 tablespoons of brown sugar 1 tablespoon of fresh thyme 1 scotch bonnet pepper (or habanero for less heat), finely chopped Juice of 2 limes Salt and pepper to taste Start by preheating your oven to 375°F (190°C). In a large bowl, combine the jerk seasoning, garlic, ginger, soy sauce, olive oil, brown sugar, thyme, scotch bonnet pepper, lime juice, salt, and pepper. This marinade is what gives the pork its signature jerk flavor—spicy, sweet, and packed with Caribbean spices. Take your chunks of pork and rub them thoroughly with the marinade. Make sure each piece is fully coated, and then let the pork marinate in the fridge for at least two hours, but overnight is even better for maximum flavor. Once the pork has marinated, place the pieces in a roasting pan and cover with foil. Roast in the oven for about 1.5 to 2 hours, checking occasionally to ensure the pork is tender and cooked through. For that perfect crispy jerk finish, remove the foil for the last 20 minutes of cooking and increase the oven temperature to 425°F (220°C). Once done, let the pork rest for a few minutes before serving. You can enjoy this flavorful jerk pork with rice and peas, grilled vegetables, or even stuffed into a sandwich for a true Jamaican experience. Ready to bring some island flavor to your dinner table? Give this oven-style jerk pork a try and let us know in the comments how it turned out! See more: Pork Shoulder Blade Steaks with Herb Cream Sauce& Roasted Root Veggies https://youtu.be/xX1vCoF36xE #JerkPorkDelight #JamaicanFlavors #OvenJerkPork
A Perfect Combo of Mushrooms, Seafood, and Vegetables: Easy ...
253 views · Oct 18, 2024 horoscopochino.co
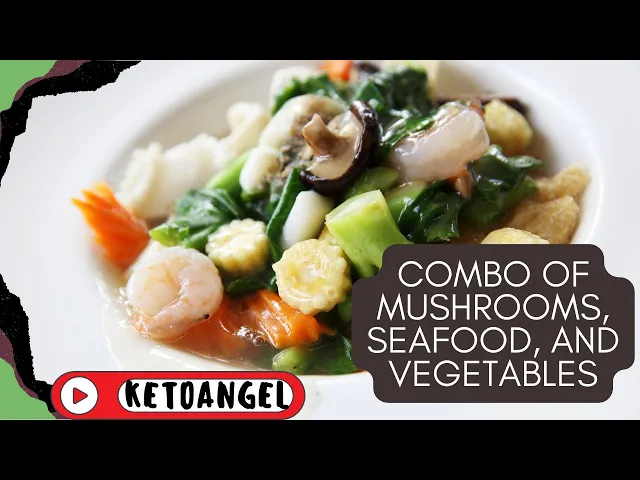
A Perfect Combo of Mushrooms, Seafood, and Vegetables: Easy and Delicious If you're searching for a meal that's not only packed with flavor but also healthy and quick to prepare, you’ve come to the right place. The combination of mushrooms, seafood, and vegetables creates a beautiful balance of savory, fresh, and satisfying. Whether you’re looking for a light dinner or a flavorful side, this dish hits all the right notes. What makes this recipe stand out? It’s all about the variety of textures and tastes. The mushrooms add a rich earthiness, the seafood brings that fresh, delicate flavor, and the veggies keep it light and vibrant. Best of all, you can make this in just 20 minutes! For a meal that serves four people, you'll need: 200g of mushrooms (button or cremini), sliced 300g of mixed seafood (shrimp, scallops, or calamari) 1 zucchini, sliced into half-moons 1 red bell pepper, chopped 2 garlic cloves, minced 2 tablespoons of olive oil Salt and pepper to taste Fresh parsley for garnish Lemon wedges for serving To start, heat a tablespoon of olive oil in a large skillet over medium heat. Add the garlic and sauté for about 30 seconds until fragrant. Next, toss in the mushrooms and cook until they begin to release their juices and turn golden, about 5-7 minutes. Once the mushrooms are done, push them to the side of the pan and add another tablespoon of olive oil. Now it’s time to add the mixed seafood. Season with salt and pepper, and cook for about 3-4 minutes until the seafood is just cooked through. The shrimp should turn pink, and the scallops should be opaque. After the seafood is cooked, add the zucchini and red bell pepper to the pan. Stir everything together and cook for another 4-5 minutes, allowing the vegetables to soften while still maintaining a bit of crunch. To finish, garnish with freshly chopped parsley and a squeeze of lemon juice for that zesty touch. This dish is fantastic on its own, or you can serve it with some crusty bread or over a bed of rice for a more filling meal. So, are you ready to give this easy and delicious mushroom, seafood, and veggie combo a try? Let us know in the comments how you liked it or if you added your own twist! #2024 #seafoodandveggies #mushroommagic #healthycomfortfood #healthyseafooddelight
Stuffed Cucumber Bites: A Refreshing and Easy Party Appetize...
68 views · Oct 18, 2024 horoscopochino.co
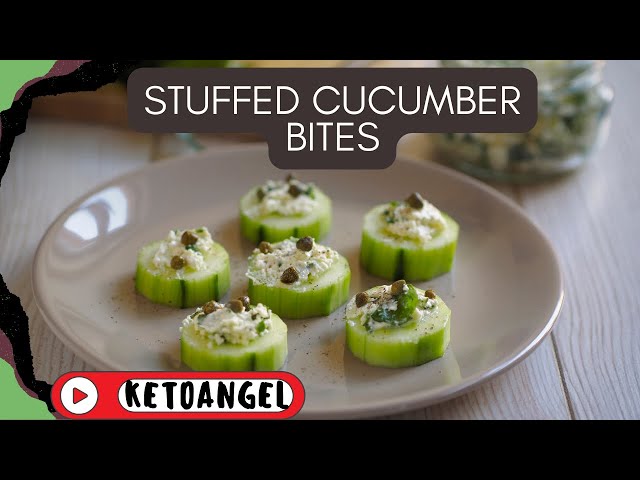
Stuffed Cucumber Bites: A Refreshing and Easy Party Appetizer Looking for a fun and refreshing appetizer that’s as easy to make as it is delicious? These stuffed cucumber bites are the perfect blend of crisp, cool cucumber paired with a rich, creamy filling. They’re ideal for parties, gatherings, or just as a healthy snack to enjoy any time of day. Not only are they light and satisfying, but they also add a colorful touch to your table. To make enough for about 4-6 people, you’ll need the following ingredients: 2 large cucumbers, 4 oz of cream cheese (softened), 2 tablespoons of sour cream, 1 tablespoon of fresh dill (chopped), 1 clove of garlic (minced), 1 tablespoon of lemon juice, ½ teaspoon of salt, ¼ teaspoon of black pepper, and a few cherry tomatoes for garnish. Start by washing and slicing the cucumbers into thick rounds, about 1-1.5 inches each. You want them thick enough to hold the filling without being flimsy. Once sliced, use a small spoon or melon baller to scoop out a bit of the center from each cucumber slice, creating a small well for the filling. Be careful not to scoop all the way through; you just want to create a space for the filling to sit in. In a medium bowl, mix together the softened cream cheese, sour cream, dill, garlic, lemon juice, salt, and pepper until smooth. This creamy filling is bursting with flavor thanks to the garlic and dill, while the lemon juice adds a refreshing brightness that pairs perfectly with the cucumber. Using a spoon or piping bag, fill each cucumber well with the cream cheese mixture. Make sure to mound the filling slightly above the edge of the cucumber for a nice presentation. For an extra touch, you can top each stuffed cucumber bite with a slice of cherry tomato or even a small piece of smoked salmon for added flavor and color. These stuffed cucumber bites are the perfect combination of crunchy, creamy, and fresh. They’re a hit at any gathering and take just minutes to prepare. Plus, they’re light and healthy, making them an excellent snack option that doesn’t weigh you down. So, are you ready to make these stuffed cucumber bites for your next event? Let us know how they turn out in the comments below! See more: Salmon and Cucumber Bites The Perfect Fresh and Flavorful Appetizer https://youtu.be/JPpvJr7SV80 #StuffedCucumberBites #CucumberAppetizer #HealthyPartySnacks
Easy Vegetable Casserole: The Perfect Comfort Dish for Any D...
473 views · Oct 8, 2024 horoscopochino.co
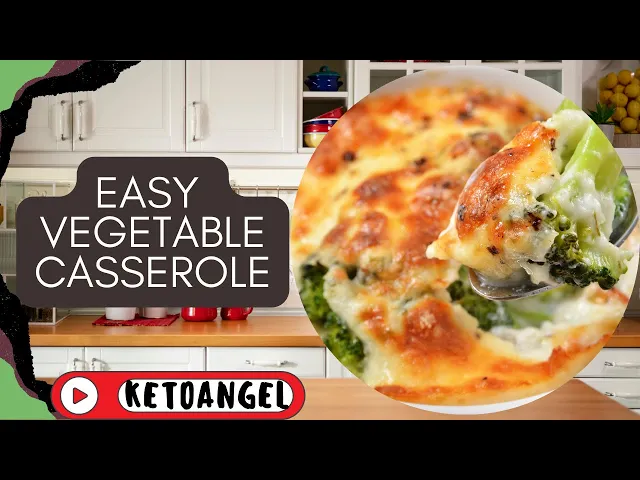
Easy Vegetable Casserole: The Perfect Comfort Dish for Any Day Looking for a comforting, wholesome meal that’s packed with flavor and veggies? A vegetable casserole is the ultimate solution. Not only is it packed with nutritious ingredients, but it's also hearty, cheesy, and just what you need to satisfy your cravings. Whether you're trying to incorporate more vegetables into your diet or just looking for an easy, crowd-pleasing dish, this vegetable casserole will not disappoint. This dish is all about simplicity. You don’t need to be a master chef to whip up a delicious vegetable casserole. It’s a perfect combination of fresh vegetables, rich cheese, and a creamy sauce that brings it all together. Plus, it’s a great way to use up any vegetables you have lying around. The beauty of this recipe is how flexible it is—you can swap out any vegetable you prefer and it will still be delicious. Ingredients: 2 cups broccoli florets 1 cup sliced carrots 1 cup sliced zucchini 1 cup cauliflower florets 1 cup frozen peas 1 cup shredded cheddar cheese 1 cup sour cream 1 can (10.5 oz) cream of mushroom soup ½ teaspoon garlic powder ½ teaspoon onion powder Salt and pepper to taste ½ cup breadcrumbs 1 tablespoon melted butter (for breadcrumbs) This recipe serves 4-6 people, making it perfect for a family dinner or as a side dish for a larger gathering. Start by preheating your oven to 350°F (175°C). Lightly grease a 9x13-inch baking dish. In a large pot, steam the broccoli, carrots, zucchini, and cauliflower for about 5-7 minutes until they are just tender but still vibrant. Drain and set aside. In a mixing bowl, combine the cream of mushroom soup, sour cream, garlic powder, onion powder, and half of the shredded cheddar cheese. Stir until smooth. Add the steamed vegetables and frozen peas to the mixture, and gently toss everything until the vegetables are well coated. Pour the vegetable mixture into the prepared baking dish and spread it out evenly. Top with the remaining shredded cheddar cheese. In a small bowl, mix the breadcrumbs with melted butter and sprinkle over the top for a crispy, golden finish. Bake for 25-30 minutes, or until the cheese is melted and the top is golden brown. Serve hot and enjoy the delicious, creamy goodness! How would you customize your vegetable casserole? Share your twist in the comments! #2024 #CheesyVegetablebake #VeggieComfortFood #EasyCasserolePerfection #vegetablecasserole

Chicken and Broccoli Casserole: A Comforting, Easy to Make F...
264 views · Oct 8, 2024 horoscopochino.co
Chicken and Broccoli Casserole: A Comforting, Easy-to-Make Family Favorite Chicken and broccoli casserole is the ultimate solution for busy weeknights or lazy weekends! This creamy, cheesy dish combines tender chicken, fresh broccoli, and a velvety sauce that melts in your mouth. It’s the kind of recipe you’ll want to keep on hand for those moments when you need something satisfying and crowd-pleasing, yet simple enough to prepare without a lot of fuss. Imagine this: juicy chicken, perfectly roasted broccoli, all smothered in a rich, cheesy sauce, baked to golden perfection. Not only is it delicious, but this casserole also packs a nutritious punch with a hearty serving of vegetables. Ingredients: 2 cups cooked, shredded chicken (about 2 chicken breasts) 3 cups fresh broccoli florets 1 ½ cups cooked rice (optional, but great for making the dish heartier) 1 can (10.5 oz) condensed cream of chicken soup 1 cup sour cream 1 ½ cups shredded cheddar cheese ½ cup milk ½ teaspoon garlic powder ½ teaspoon onion powder Salt and pepper to taste ½ cup breadcrumbs (for topping) 1 tablespoon butter (melted, for breadcrumbs) This recipe serves four to six people and is super easy to make. Begin by preheating your oven to 350°F (175°C). In a large pot, steam or lightly blanch the broccoli until tender, but still bright green—this takes about 3 to 4 minutes. Drain and set aside. In a mixing bowl, combine the cooked chicken, broccoli, rice (if using), condensed cream of chicken soup, sour cream, milk, garlic powder, onion powder, and half of the shredded cheddar cheese. Season with salt and pepper to taste. Pour the mixture into a greased 9x13-inch baking dish and spread it evenly. Sprinkle the remaining cheese on top. For a golden, crunchy topping, mix the breadcrumbs with the melted butter and sprinkle them evenly over the casserole. Bake for 25-30 minutes until the cheese is bubbly and the breadcrumbs are golden brown. Serve hot and enjoy the heartwarming flavors! What would you add to your chicken and broccoli casserole to make it your own? #CheesyCasserolePerfection #EasyComfortFood #ChickenBroccoliBake

Easy Keto Chicken Crust Pizza Recipe-Video
4K views · Apr 22, 2024 horoscopochino.co
Easy Keto Chicken Crust Pizza Recipe-Video. This easy keto chicken crust pizza will become your new go-to meal! It's satisfying, incredibly flavorful, and ridiculously simple to whip up. Transforms Chicken into a Scrumptious Crust

Easy American Brown Ale Recipe: Video
267 views · Mar 22, 2024 horoscopochino.co
Easy American Brown Ale Recipe: Video. This recipe is perfect for beginners, yielding a delicious and crowd-pleasing brew. Let's get started! Ingredients (for a 5-gallon batch): Grains (6.6 lbs total): 5 lbs American 2-Row malt (base malt)

Easy American Chicken Chop Suey Recipe: Video
911 views · Mar 22, 2024 horoscopochino.co
Easy American Chicken Chop Suey Recipe: Video. It's a simple dish with roots in Chinese-American cuisine, beloved for its satisfying mix of juicy chicken, vibrant vegetables, a savory sauce, and those iconic crispy noodles.

EASY KETO SHORTBREAD Buttery :video blog
11K views · Dec 24, 2023 horoscopochino.co
EASY KETO SHORTBREAD Buttery :video blog. This recipe makes around 15-20 cookies, perfect for satisfying your sweet tooth or sharing with fellow keto comrades. Here's what you'll need: * 2 cups almond flour: Finely ground blanched almond flour is key for a smooth, delicate texture.

Delicious Mango Graham: An Easy Recipe for Everyone
3K views · Dec 24, 2023 horoscopochino.co
Learn how to make a delectable mango graham dessert with this simple recipe. Perfect for any occasion, this sweet treat will surely satisfy your cravings. Watch now and discover the steps to create this delightful dish.

Easy Gluten Free Lemon Tart Recipe: A Zesty Treat for All
2K views · Dec 21, 2023 horoscopochino.co
Easy Gluten-Free Lemon Tart Recipe: A Zesty Treat for All In the world of desserts, lemon tart stands out for its refreshing zing and delightful sweetness, a true testament to the wonders of citrus in baking. For those following a gluten-free diet, either by choice or necessity, this doesn't mean missing out on such a delightful treat. Ingredients: For the Gluten-Free Tart Shell: - 1 1/2 cups gluten-free all-purpose flour - 1/2 cup almond flour - 1/2 cup cold unsalted butter, cubed - 1/4 cup granulated sugar - 1 egg - 1/4 teaspoon salt For the Lemon Filling: - 1 cup fresh lemon juice (about 4-5 lemons) - 2 tablespoons lemon zest - 1 1/4 cups granulated sugar - 4 large eggs - 4 egg yolks (in addition to the eggs) - 1/2 cup unsalted butter, melted Instructions: 1. Prepare the Tart Shell: Begin by making the tart shell. In a large bowl, whisk together the gluten-free all-purpose flour, almond flour, and salt. Add the cold, cubed butter and use your fingertips or a pastry cutter to work it into the flour until the mixture resembles coarse crumbs. Stir in the sugar. Add the egg and mix until the dough comes together. Press the dough into a disk, wrap in plastic, and chill for at least 30 minutes. 2. Shape and Bake the Shell: Preheat your oven to 350°F (175°C). Roll out the dough between two sheets of parchment paper to fit a 9-inch tart pan with a removable bottom. Press the dough into the pan, trimming any excess. Prick the bottom with a fork and bake for 15-20 minutes or until lightly golden. 3. Make the Lemon Filling: In a mixing bowl, whisk together lemon juice, lemon zest, sugar, eggs, and egg yolks. Stir in the melted butter until well combined. 4. Cook the Filling: Pour the lemon mixture into a saucepan and cook over medium heat, stirring constantly, until it thickens enough to coat the back of a spoon. This should take about 10 minutes. 5. Assemble the Tart: Pour the warm lemon filling into the cooled tart shell. Smooth the top with a spatula. 6. Bake the Tart: Return the tart to the oven and bake for an additional 10-15 minutes, or until the filling is just set and slightly wobbly in the center. 7. Cool and Serve: Allow the tart to cool completely at room temperature. Then refrigerate it for at least 2 hours before serving. 8. Garnish and Enjoy: Before serving, garnish with fresh lemon slices, whipped cream, or a dusting of powdered sugar for an added touch of elegance. Tips for the Perfect Gluten-Free Lemon Tart: - Ensure your gluten-free flour blend is of good quality and contains xanthan gum, which helps in binding the ingredients. - Keeping the butter and the dough cold ensures a flaky crust. - Don't rush the cooling process; a well-set filling is key to the perfect tart. - Adjust the amount of sugar based on your preference for sweetness. This gluten-free lemon tart is a delightful dessert that doesn't compromise on taste or texture. The combination of a buttery, flaky crust with a smooth, citrusy filling makes this tart a must-try recipe. Enjoy this gluten-free twist on a classic, knowing that it's crafted to be savored by everyone! #glutenfree #lemontart #tartrecipe Join this channel to get access to perks: https://www.youtube.com/channel/UCiYWdkC423tS39wz6Aj3AVQ/join
Fried rice recipe easy
3K views · Oct 1, 2022 horoscopochino.co
Fried rice recipe easy With this classic recipe, you can make fried rice at home. In 15 minutes, you can customize it to suit your taste with your favourite add-ins, and it is so flavourful and delicious! Stir 1/2 tablespoon butter into a large sauté pan over medium-high heat until it melts. In a medium saucepan, heat the butter and add eggs. Stir occasionally until they are scrambled. Put the egg on a separate plate and remove it. A further 1 tablespoon of butter should be added to the pan and heated until melted. After adding carrots, onion, peas, and garlic, season with salt and pepper, and begin cooking. The onion and carrots should be soft after about 5 minutes of sautéing. Stir in the remaining 1 1/2 tablespoons of butter, then raise the heat to high. Stir together the rice, green onions, soy sauce, oyster sauce (if using), and oyster sauce (if using). Add the rice to the pan and sauté for another 3 minutes, stirring occasionally. Add the eggs and stirred to combine (I like to let the rice rest between stirs so that it crisps up on the bottom.) Combine the sesame oil with the hot sauce and turn off the heat. In case extra soy sauce is needed, taste and season. You can serve it right away or refrigerate it in a sealed container for up to 3 days. https://horoscopochino.co/chinese-fried-rice/?lang=en